How to Reduce PDF Size and Create Smaller Documents
Why are PDFs sometimes much larger than they need to be? Below you will find some tips on how to create size-efficient documents that look great without being excessively large. These strategies can be applied to any desktop publishing software of your choice. However, for the purpose of this article, we will use Swift Publisher for Mac, an easy-to-use page layout application.
Design Wisely
The main contributor to the size of a PDF is raster images. They are made of pixels, which can be seen if you zoom in to an image (e.g. digital photos, screenshots, etc). How far you have to zoom in before you can see individual pixels is determined by the resolution, and higher resolution means larger file size. With the help of certain measures, you can considerably reduce a PDF size without compromising its quality.
Here are some rules to follow at the design stage:
Avoid Excessive Use of Raster Images Whenever Possible
Of course, this depends on the nature of the document, but it’s something that should be kept in mind. Modern digital cameras produce high-resolution photos. For example, a camera with a 10 megapixel sensor produces 3872 × 2592-pixel images, and an image file may take up from 2 to 20 MB, depending on the format and quality settings. So, if you’re using numerous photos in your document, the document file can become excessively large.
Decrease Resolution of High-resolution Photos
In many cases, you can considerably reduce a document’s size without sacrificing the quality by downsampling images to lower resolutions. To print a 2 × 3 inch photo at 300 DPI (dots per inch) which is good quality, you only need a 600 × 900 pixel image.

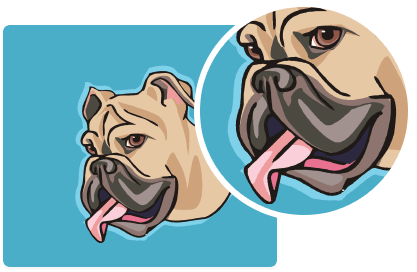
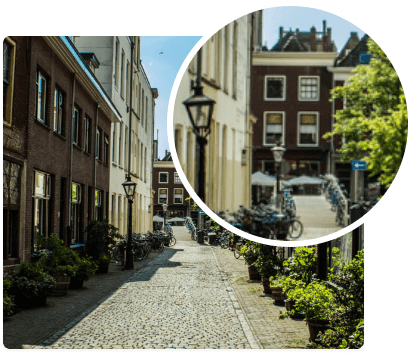
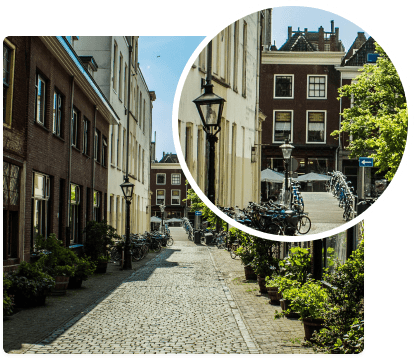
Excessive image resolution

Sufficient image resolution
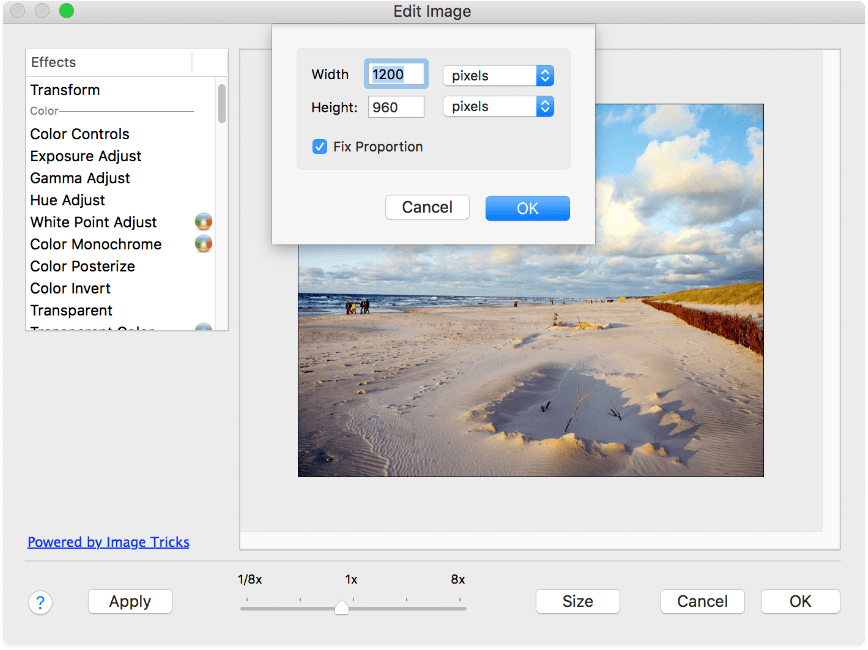
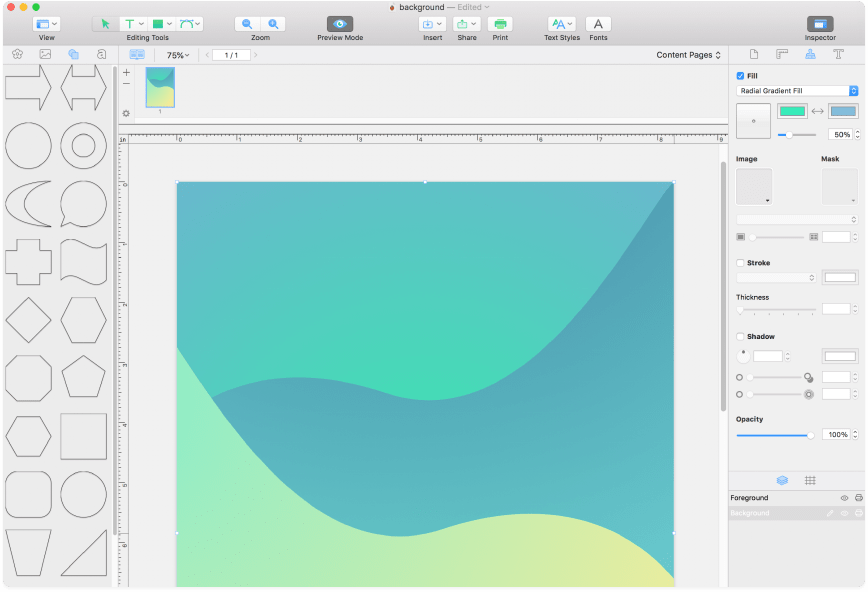
In Swift Publisher, you can use the built-in Image Tricks plugin for this task. Double-click on an image, and then, in the plugin window that comes up, click on the Size button and set the desired size in pixels or percentage, as shown in the figure below. Then click OK.
Favor Vector Graphics—They Always Look Crisp and Take Up Little Space
Vector images are mathematical calculations that form lines and shapes. If you zoom into a vector graphic, it will always look the same. Vector files typically have .eps, .svg or .pdf file extensions, are small in size and can be resized without any loss of quality.
Use Built-in Drawing Tools Whenever Appropriate
Drawing or page layout programs normally have a set of vector drawing tools that can often be used instead of inserting an image. For example, if you need a simple background with a repeating pattern, it may be easily created with the drawing tools.
Use the Right Export Settings
Once you’ve designed your document, having taken into account the considerations above, you need to export it to PDF. This is probably the most important stage concerning the PDF size. Export settings affect the resulting PDF size dramatically.
First of all, you need to have a clear idea of how your PDF will be used.
- If you’re preparing it for a printshop and are not planning to distribute over the internet, the file size is not really important.
- If the document is distributed over the internet but is not intended for printing, you may choose lower quality to reduce the PDF size. However, if your users are likely to print the document, the quality should be adequate to the task.
In Swift Publisher, you can control export settings in the Export Options dialog, using the Image Quality drop-down list, as shown below:
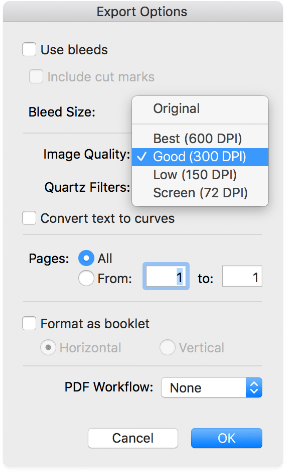
The Original option means that all the images in your document will be retained in the PDF as they are, without any modification. Usually, this option provides the best quality and is highly recommended if your document contains vector images (to prevent them from being rasterized). However, if your document includes a lot of high-resolution photos, use it with care because the PDF file size might dramatically increase in size.
The Best (600 DPI) option means that all images will be rasterized, and the resolution will be set to 600 DPI. Use this setting if your PDF will be used for high-quality printing (either at home or at a printshop).
The Good (300 DPI) option is the recommended setting for non-demanding tasks, as the quality is sufficient for both commercial and home printing, while the file size is relatively small.
The Low (150 DPI) option may be used if your document will be distributed over the internet. It produces a much smaller file, but the quality is still adequate for printing and zooming in on the images. For example, it is a good option for a newsletter distributed over email or as a website download.
The Screen (72 DPI) option results in the smallest file size, but is only recommended if the file is intended for viewing only (e.g., when sending a preview for approval).
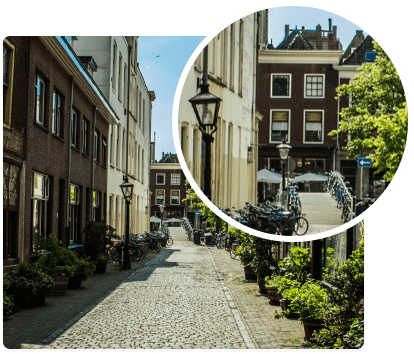
The following are examples of images using different DPI options:

Great quality for both web and printing
Sufficient quality for web and non-demanding printing
Enough for web, not sufficient for printing
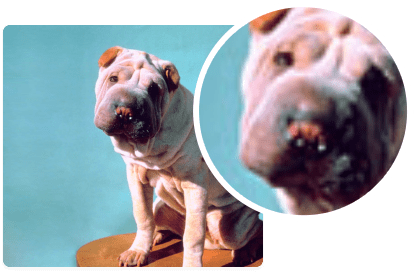
You can also apply the Reduce File Size filter from the Quartz Filters drop-down to minimize the file size even more (up to 10–15 times smaller than without the filter). If combined with higher DPI settings (600 or 300 DPI), it can produce decent results at a fraction of the file size. However, the images will become somewhat blurry.
Reducing the Size of an Existing PDF
What if all you have is a large PDF file, and you don’t have access to the original document from which it was created? It is still possible to reduce its size using some third-party tools.
Apple’s Preview App
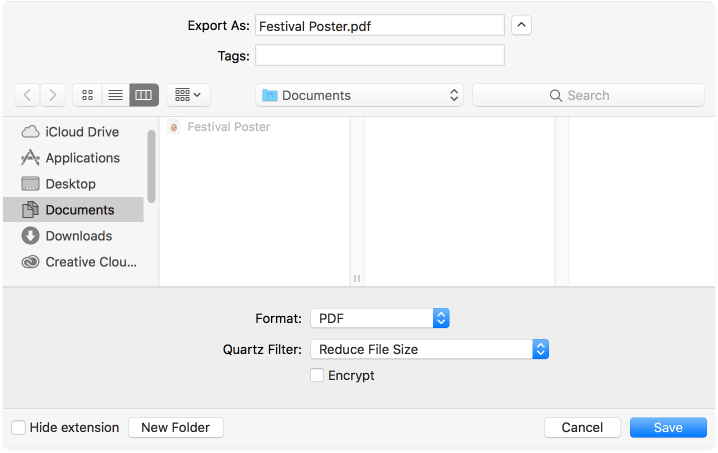
If you’re using a Mac, you can utilize the system’s Preview application to apply the same Reduce File Size filter as described above. Open the PDF file you need to shrink and choose File > Export. In the File window, make sure the Format is PDF, then choose Reduce File Size from the Quartz Filter drop-down. The resulting PDF will be much smaller, but the quality will be somewhat compromised (although acceptable for viewing and even draft printing).
Great quality. Large file size

Enough for web, but not for printing. Small file size
An Online Service (Such as iLovePDF)
This solution works for both Mac and Windows users and offers quality compression (along with many other tools for working with PDFs). If your document is not top secret, and you’re not anxious about uploading it to a server, this solution is free, fast and efficient.
We’re using iLovePDF as an example, though there are lots of others. There are three compression levels as indicated below: the higher the compression the lower the quality.