Swift Publisher for Mac Tutorial: Design Your Flyer
Are you tired of using generic templates for your flyers? Do you want to create eye-catching designs that truly reflect the essence of your brand or event? Look no further than Swift Publisher, a powerful and user-friendly desktop publishing software.
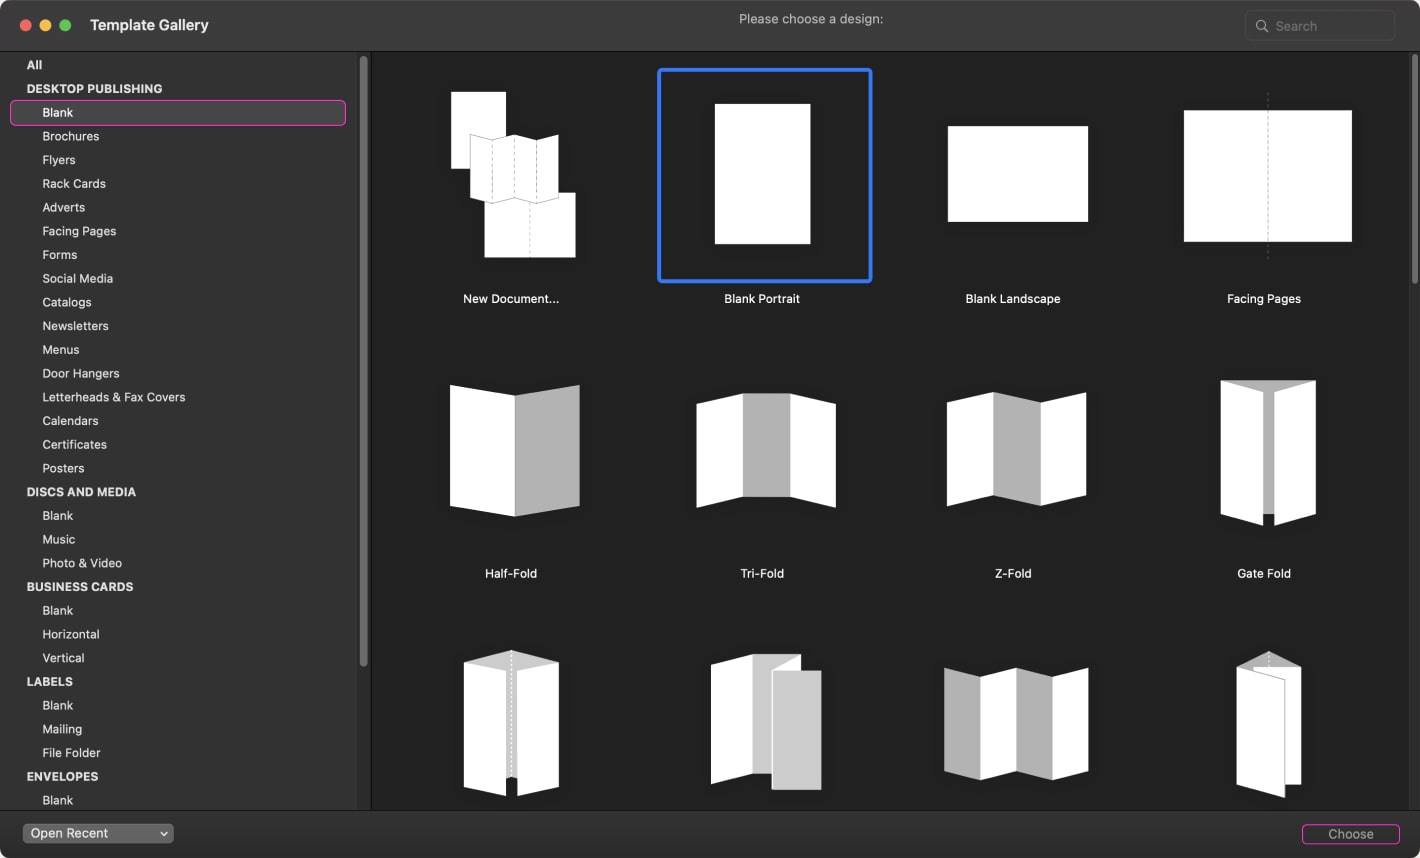
Open Swift Publisher, select Blank Portrait in the “Desktop Publishing” category and press the Choose button on the right bottom side of the interface.
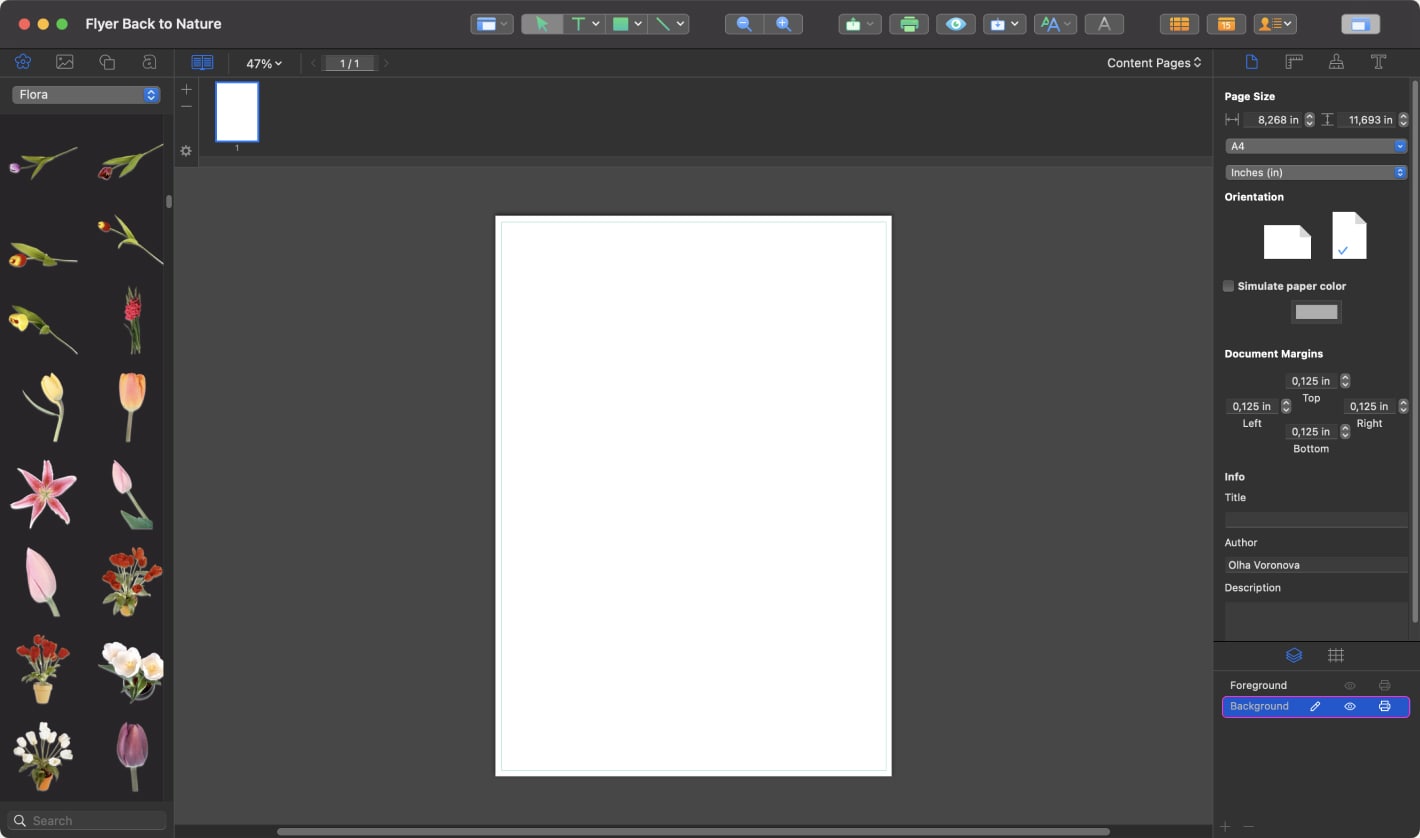
On the right bottom side of the Inspector, select the Background layer. If you want to rename this layer, simply double click on it.
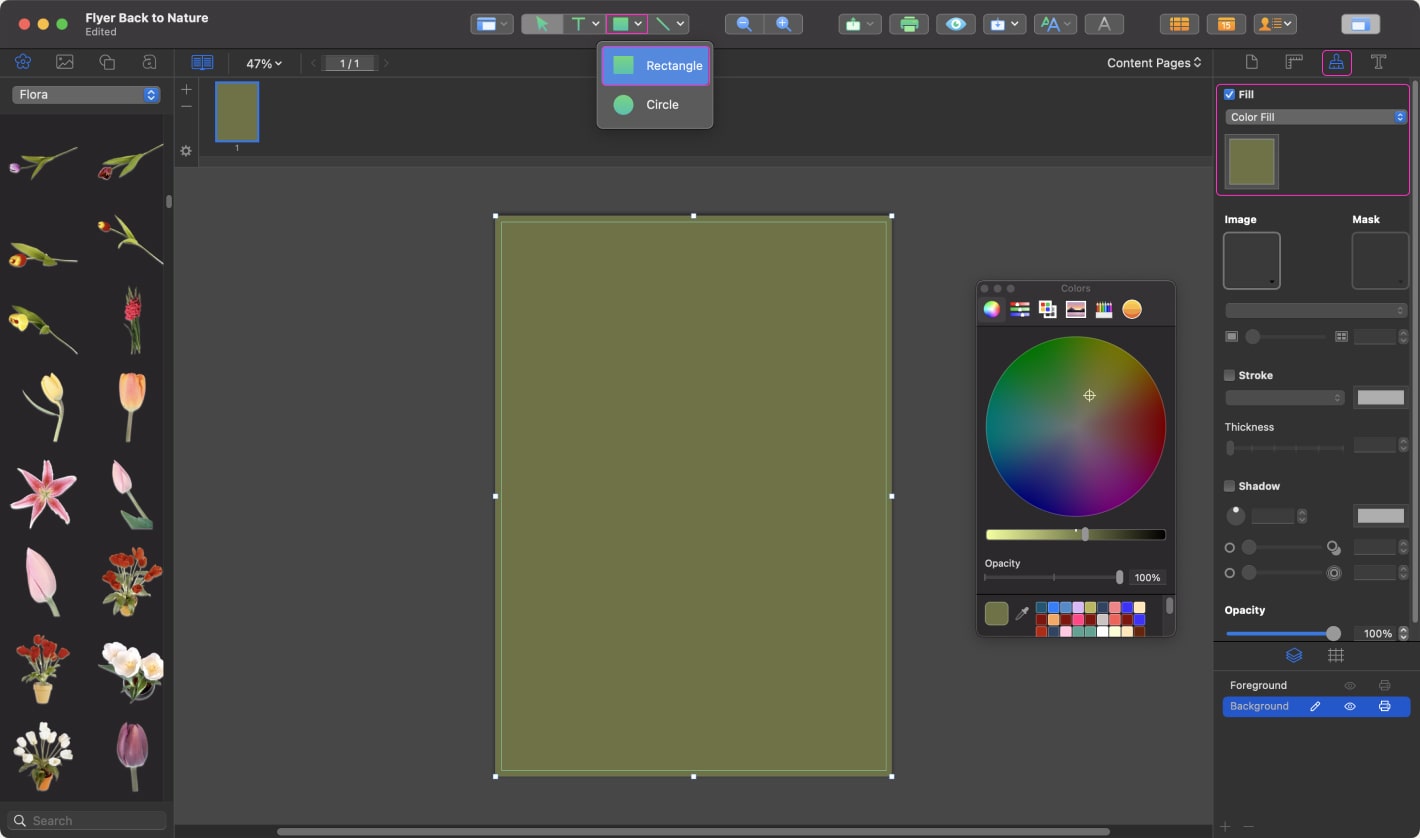
Let’s create a rectangle with a Color fill. In the Toolbar, select the rectangle tool and create a rectangle the same size as the canvas. Then, in the Inspector, go to Appearance, tick the check box Fill and select an olive color in the color panel that is close to the background color in the screenshot.
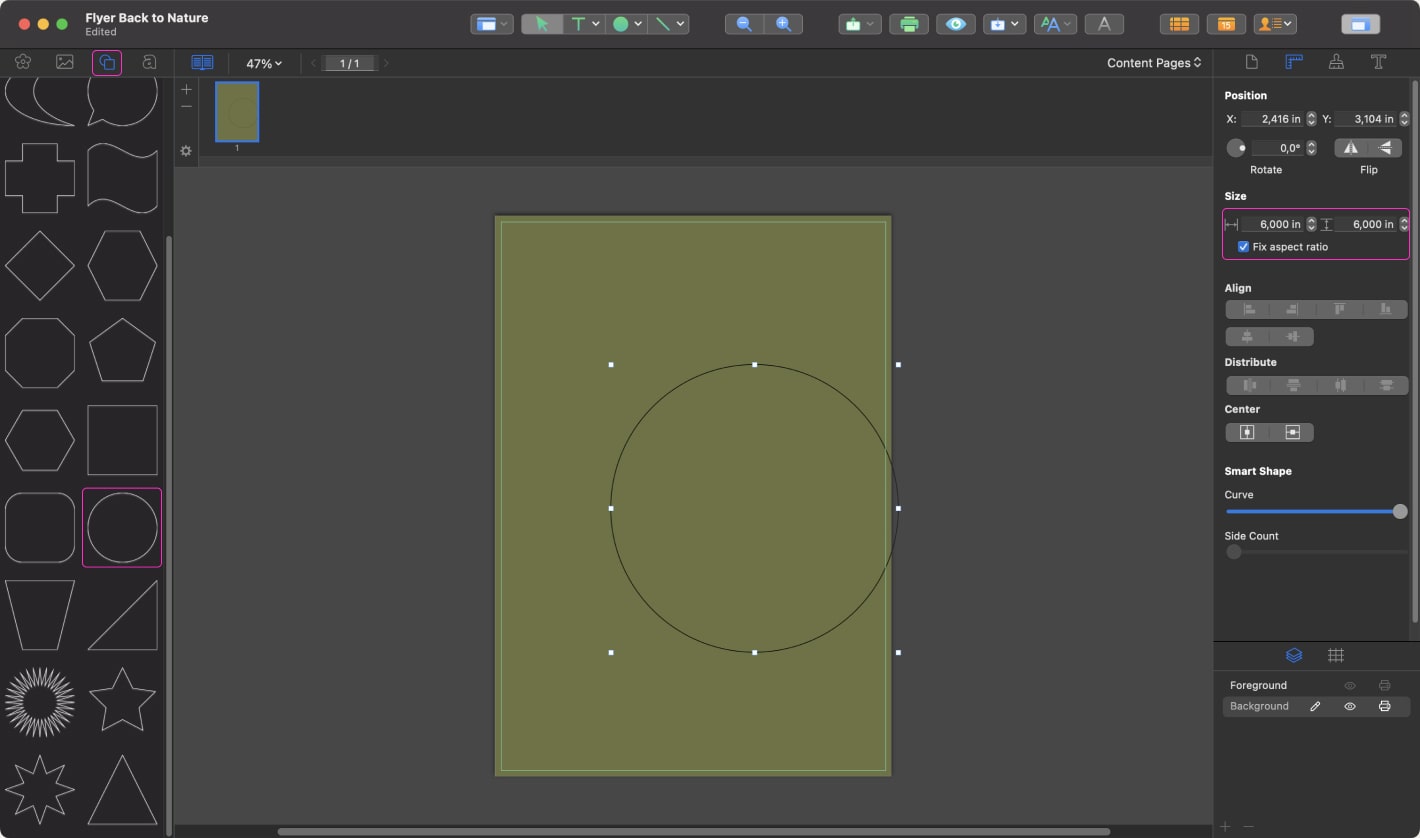
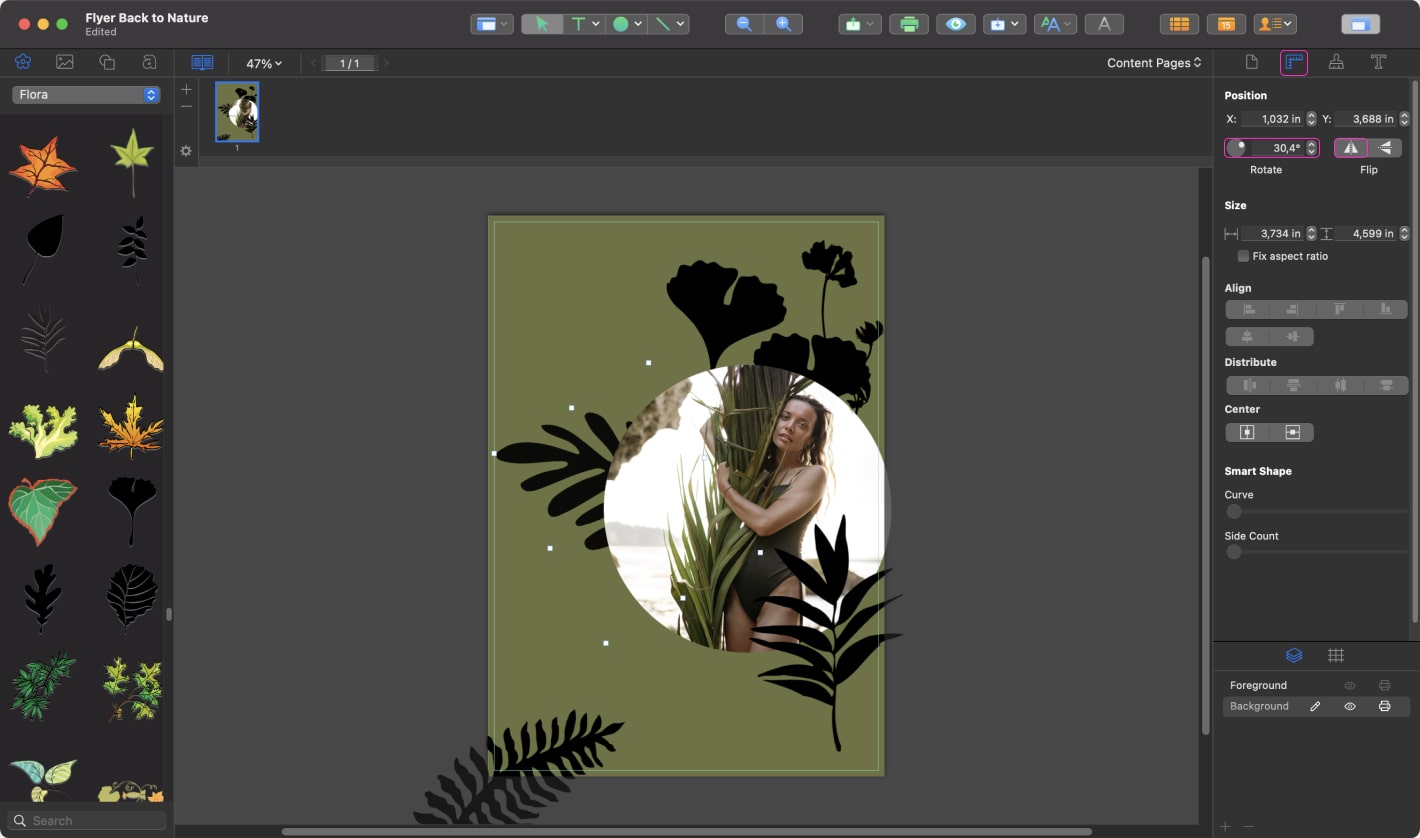
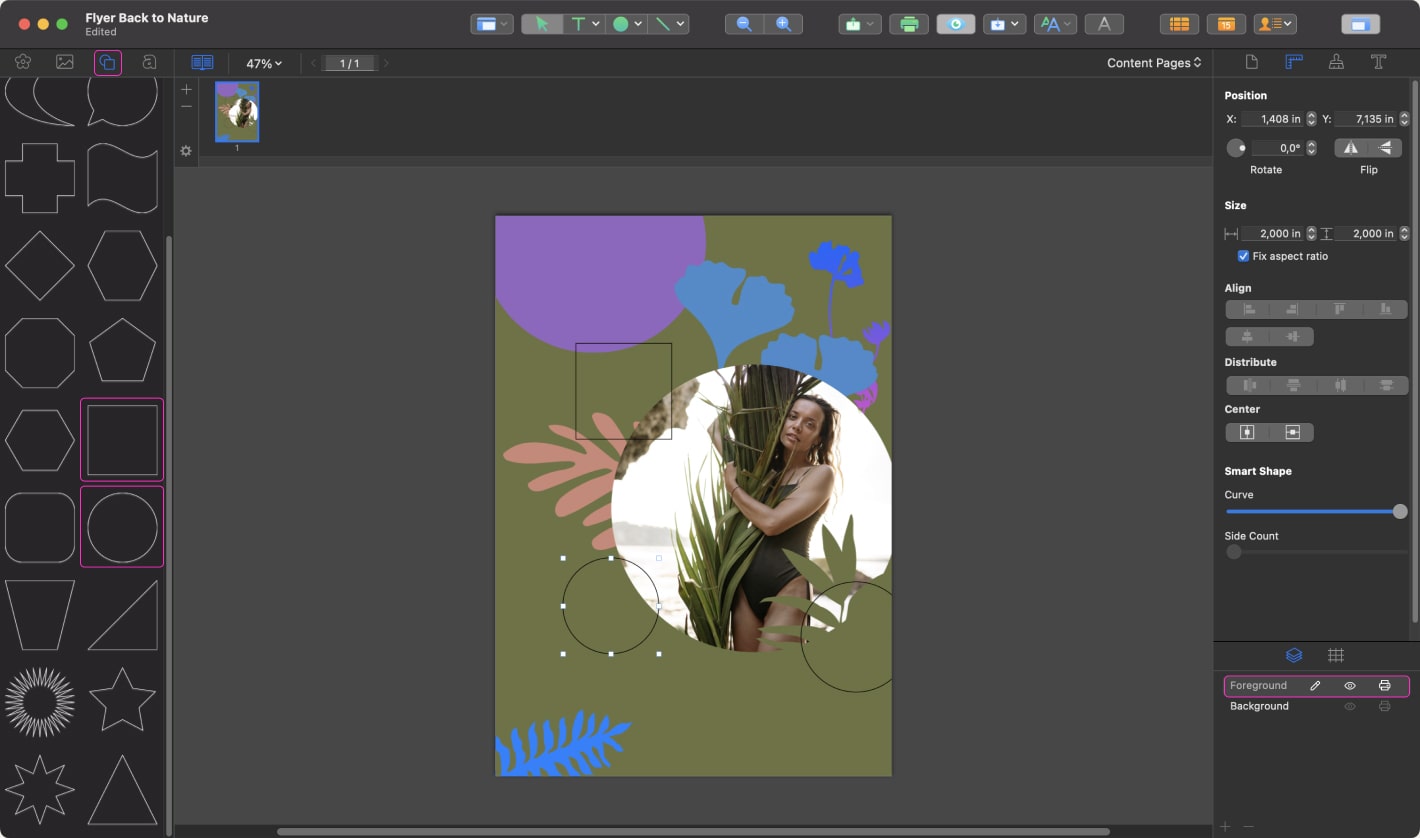
Go to the Source Panel on the left side of the interface and select the Smart Shapes icon. Choose the circle shape and create a circle with the size 6″×6″. You can put the exact dimensions in the Inspector > Geometry panel > Size.
Tip: if you tick the check box Fix aspect ratio, then the numbers in the input will be resized proportionally.
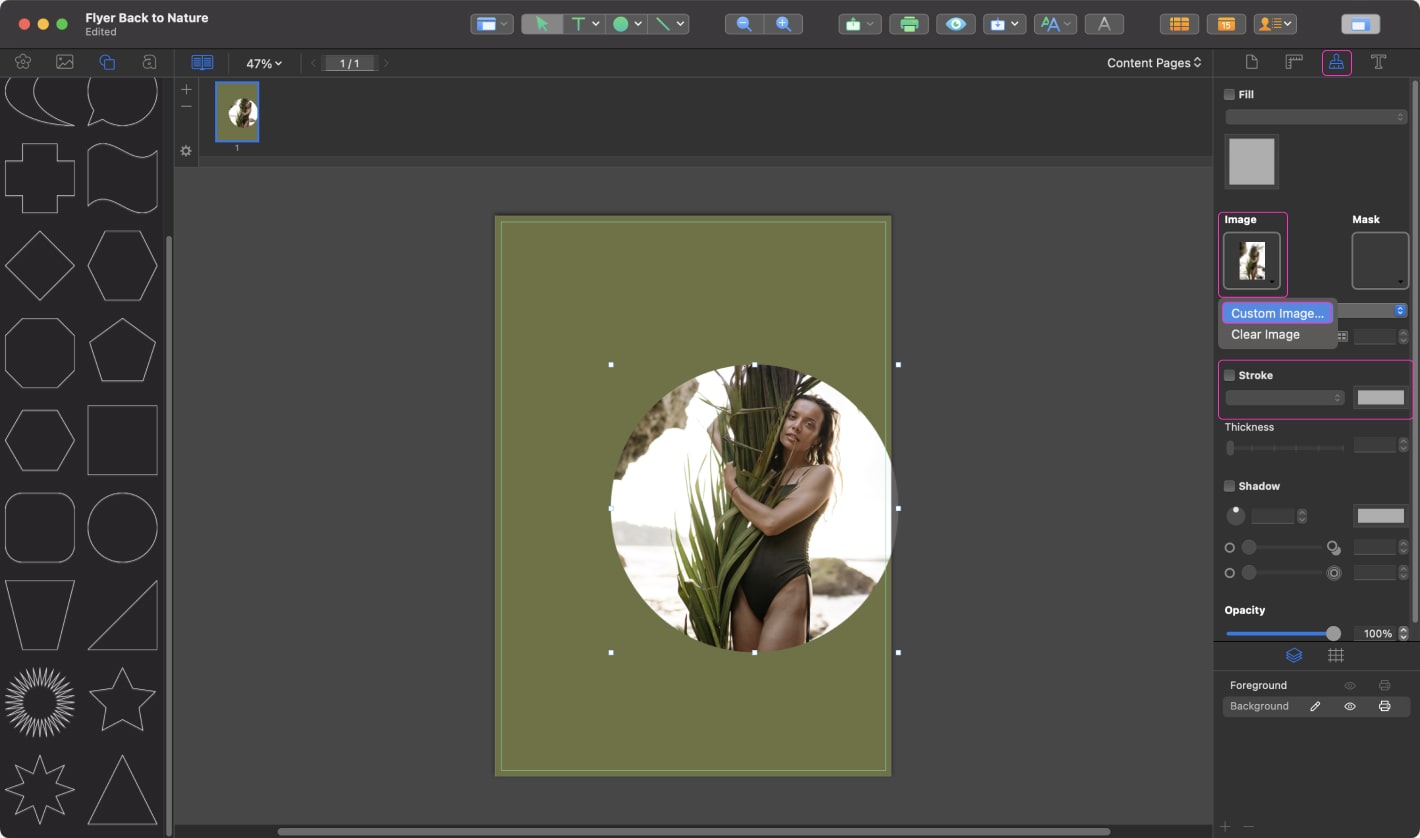
Let’s insert an image in our circle. Be sure that the circle you create is selected. Then go to Inspector > Appearance > Image and choose “Custom Image” from the dropdown menu. Find the image that you like on your computer and add it. When you’re done, uncheck the checkbox Stroke to remove it from the circle.
It’s time to add more details. Go to the Source Panel and select Clipart Collection. Choose the “Flora” from the dropdown menu. You can go through the list and add plants that you like on your canvas. In our template, we decided to choose plants that look more tropical.
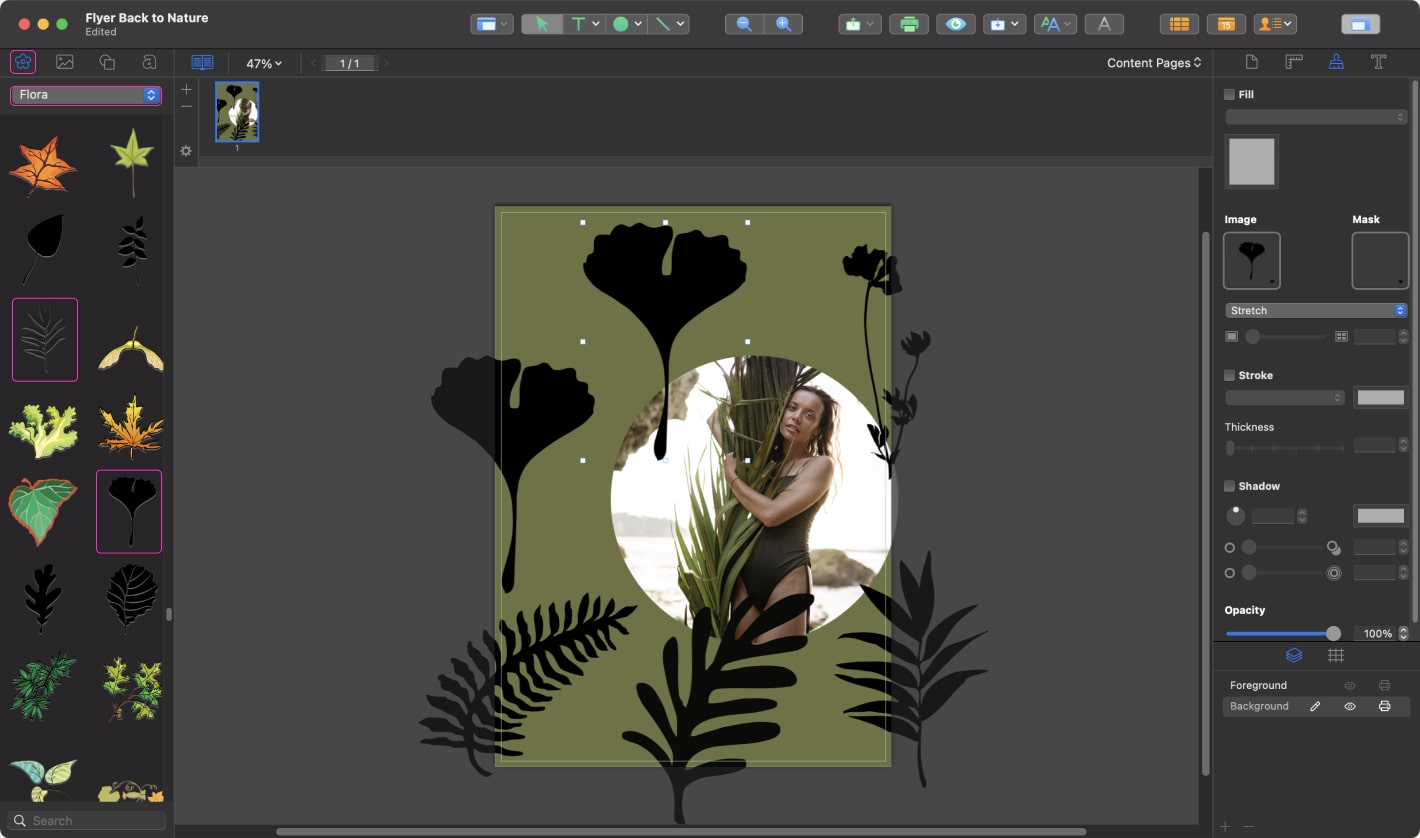
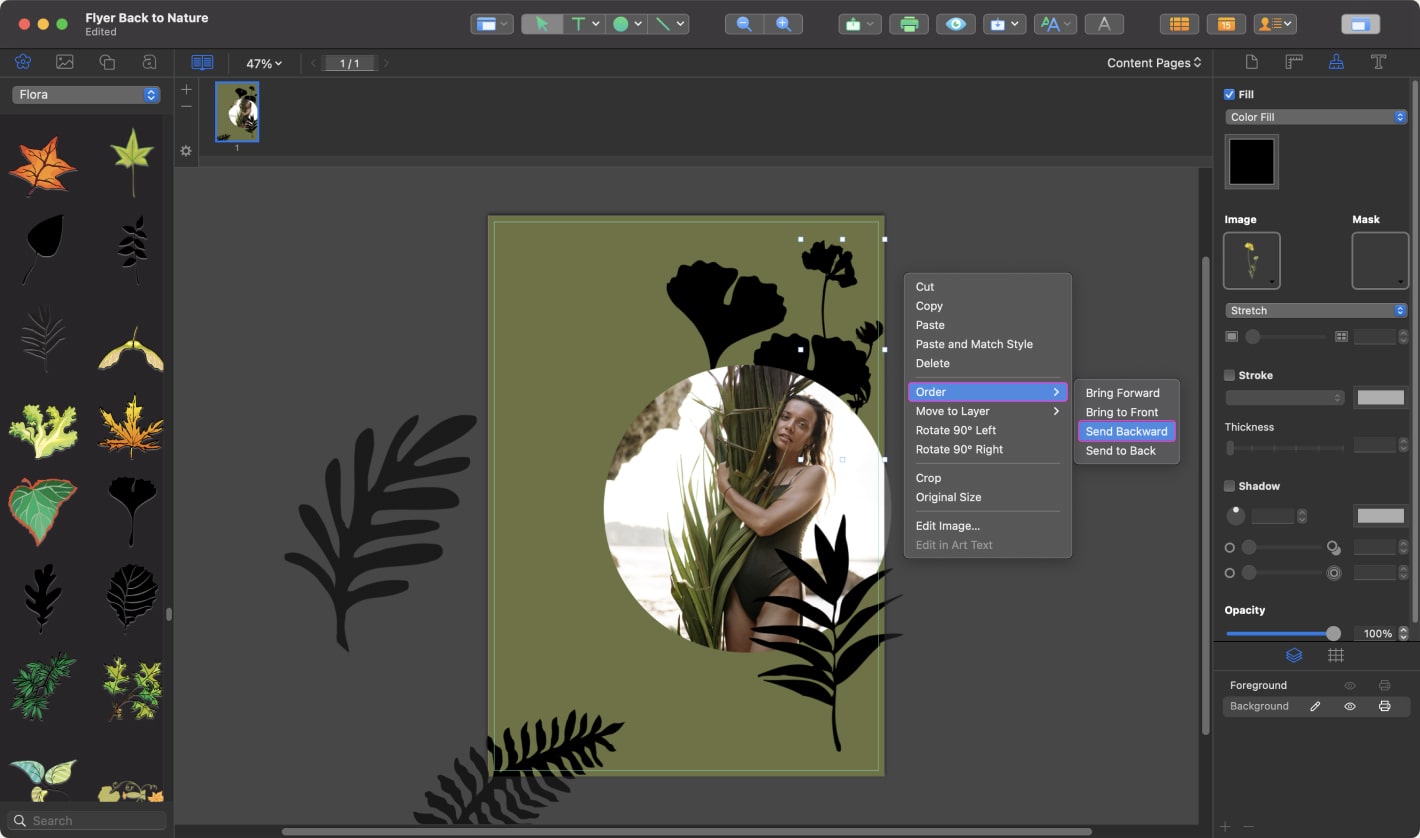
Select clipart plants and place them in the same position as on the screenshot. To move several of them behind the picture, click the right mouse button on the clipart object and choose Order > Send Backward in the context menu. If the clipart isn’t sent to the background on the first try, then go ahead and repeat the action several times.
If some clipart objects don’t have the right direction, you can simply flip them. Select the object that you want to flip, go to Inspector > Appearance and click on the icon “Flip left/right.” In our template, we also used the Rotate control to change the angle of the object.
Now we are going to change the color of our plants. Go to Inspector > Appearance and tick the check box Fill and select a color in the color panel. In our case, we used several shades of blue and rosy brown for the background color to fill the leaves.
Tip: to hide parts of plants that go beyond the canvas, click the eye icon (marked in yellow) on the Toolbar.
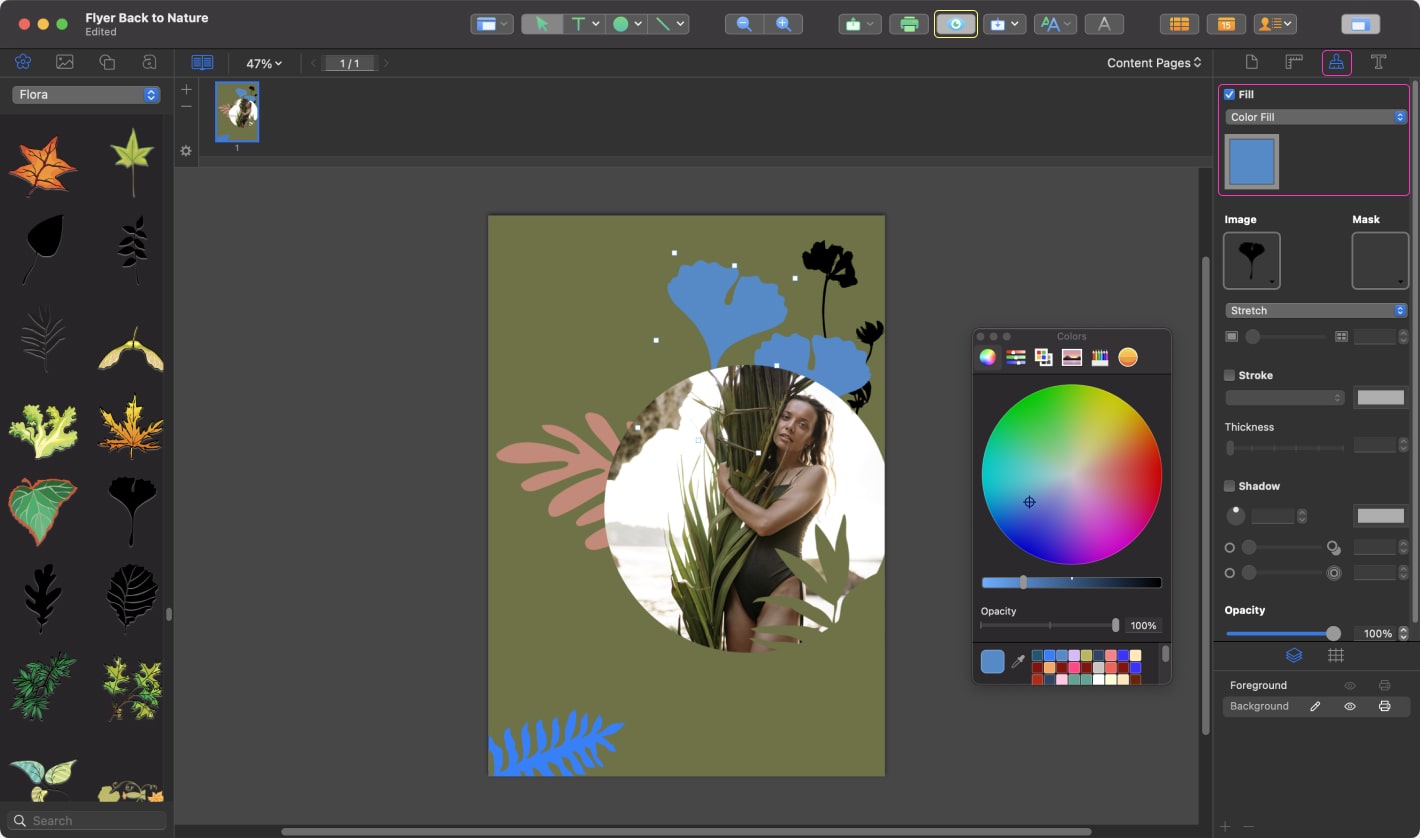
Now we are going to fill the last clipart plant with the gradient. So, in Appearance, choose from the dropdown menu “Linear Gradient Fill.” Create the gradient using pink and blue colors.
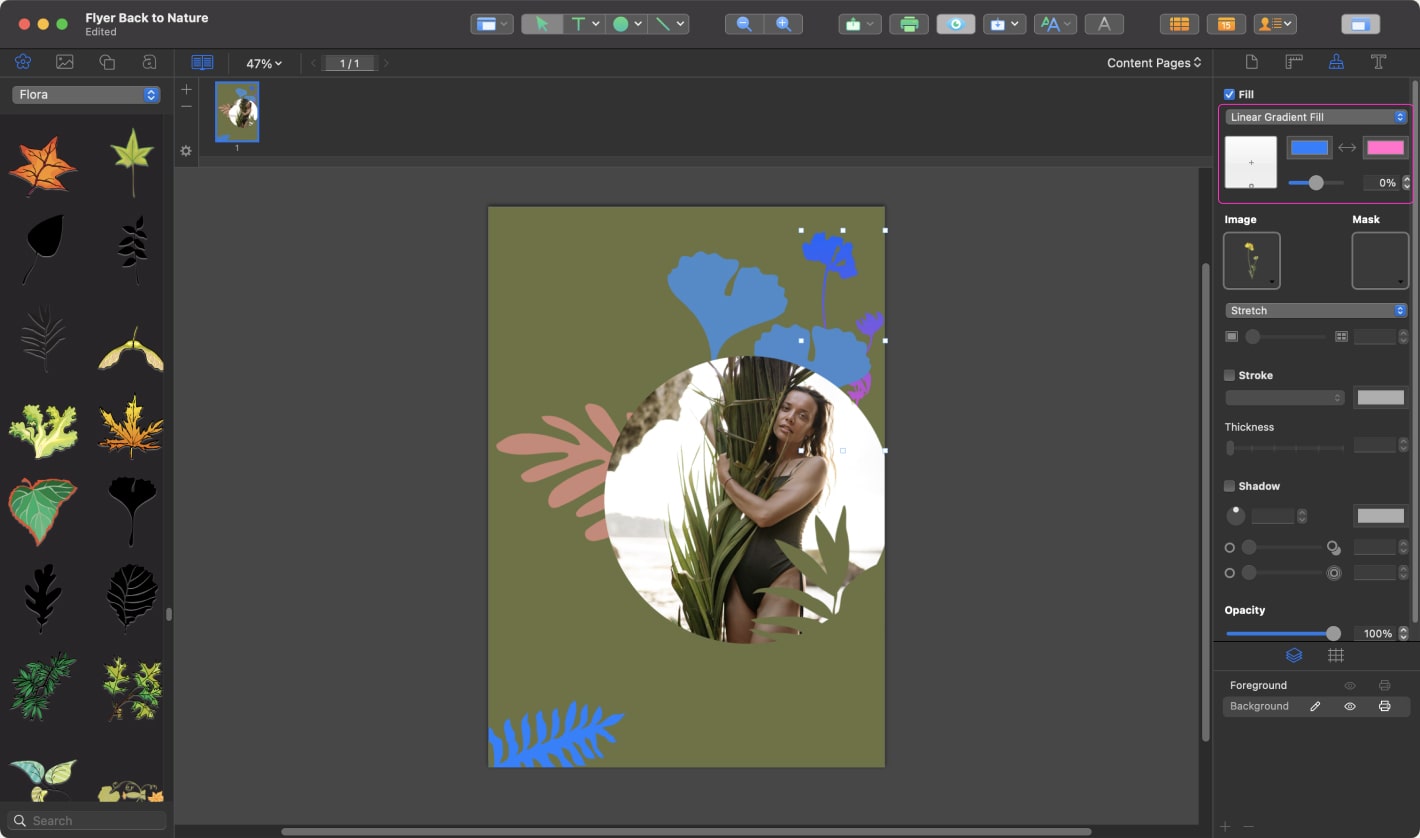
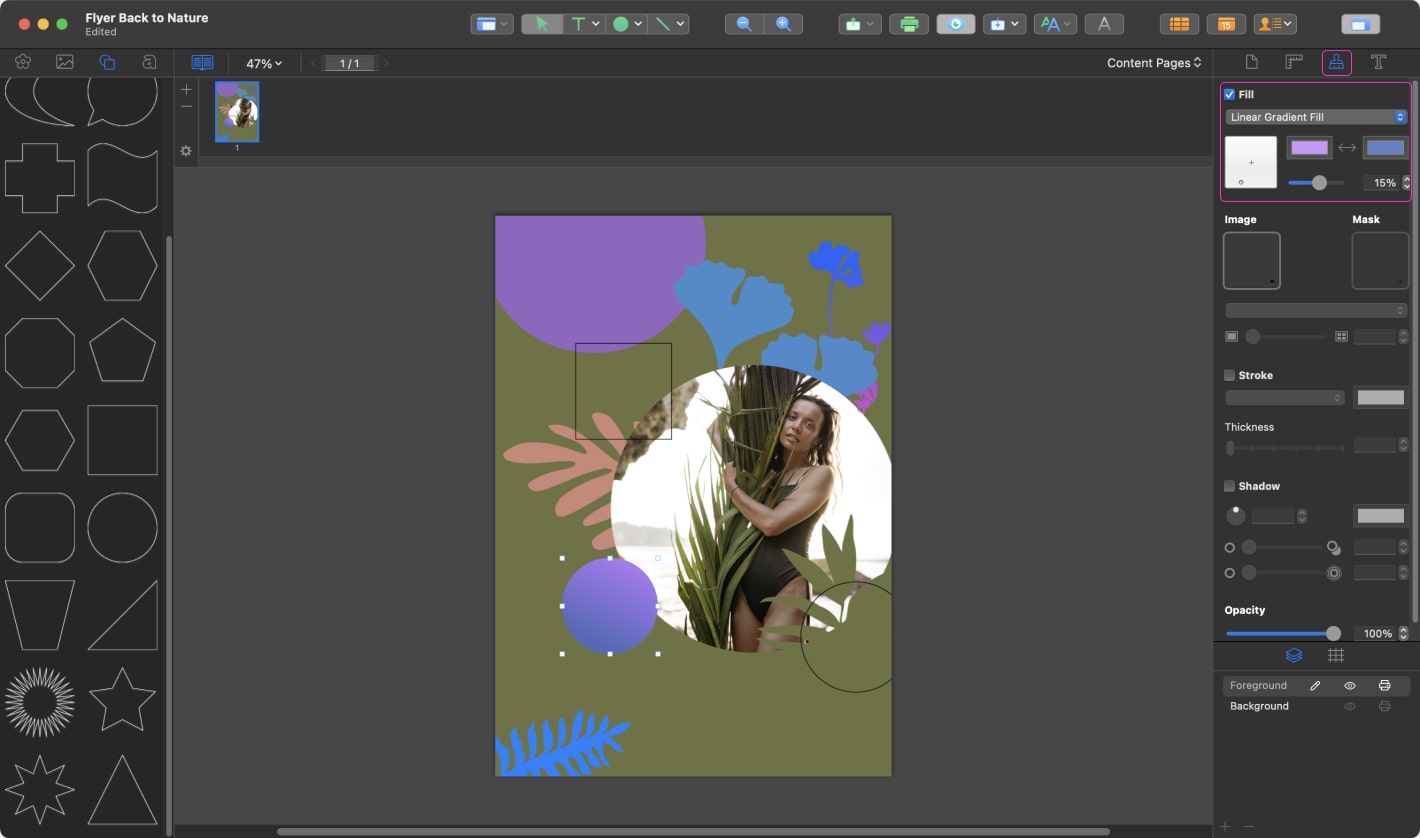
To finish the Background composition, let’s add one more circle and fill it with a solid color. You can add the circle using the same method as described in Step 4.
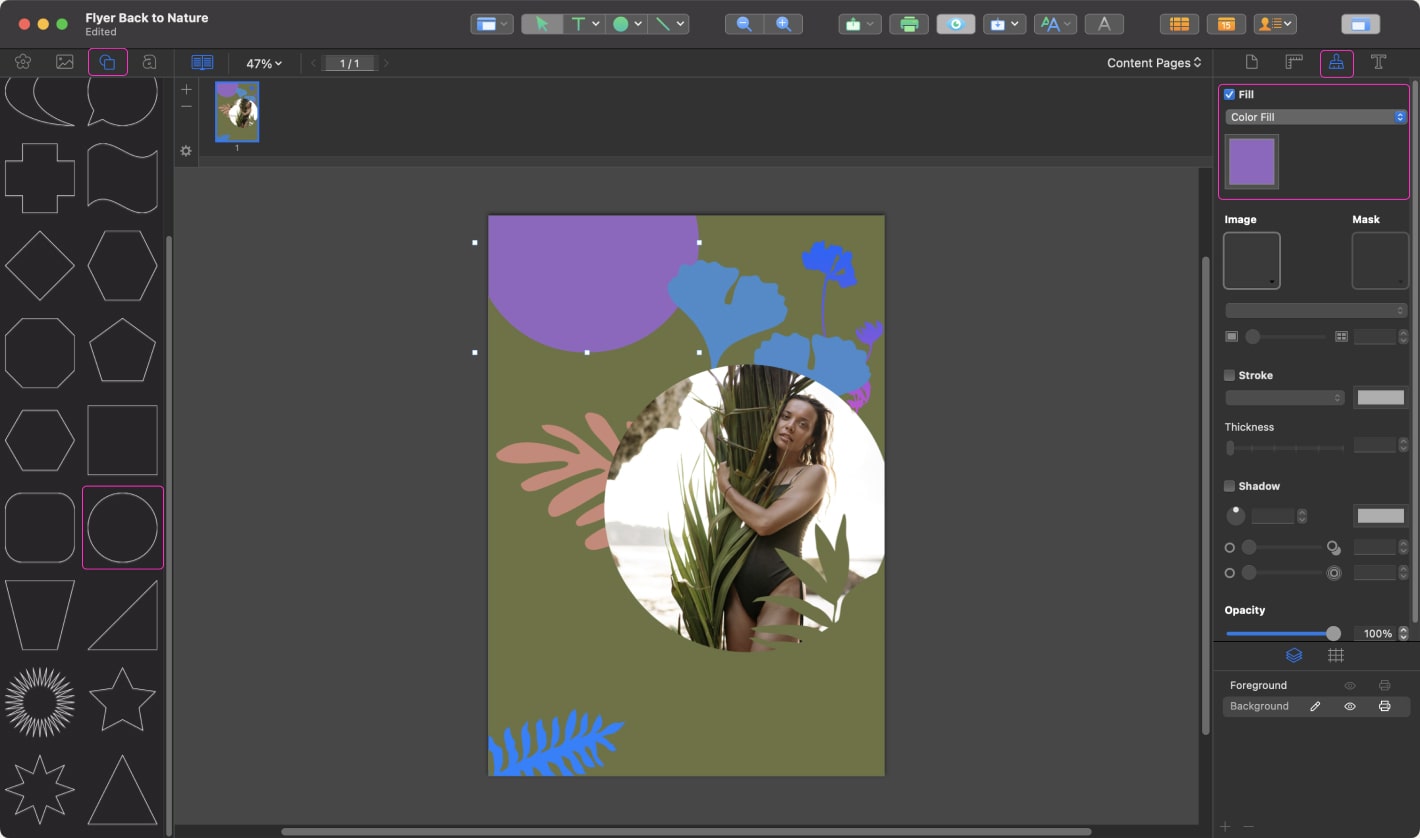
Awesome! Now we are ready with the Background composition. Go to the Layer panel and switch to the Foreground layer. Add several smart shapes (two circles and one square) using the same method as described in Step 4. Place them in the same position as on the screenshot.
Add the gradient to the one circle using the same method as described in Step 10.
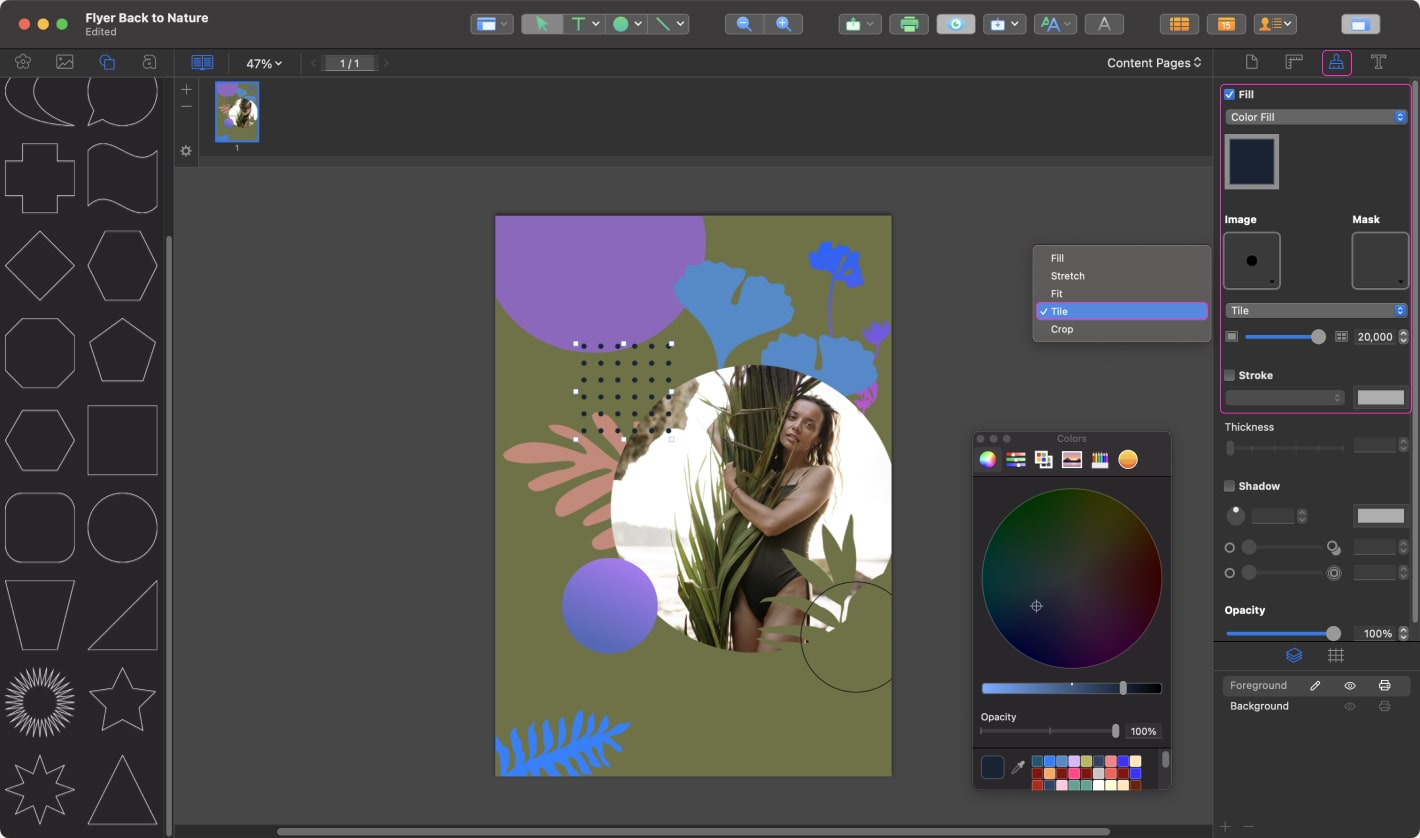
Let’s fill the square with the pattern. Select the square smart shape and add the image of the small circle from your computer using the same method as described in Step 5. Then choose “Tile” from the dropdown menu. Use the slider to adjust the size of the image tiles. Uncheck the Stroke box to remove the stroke.
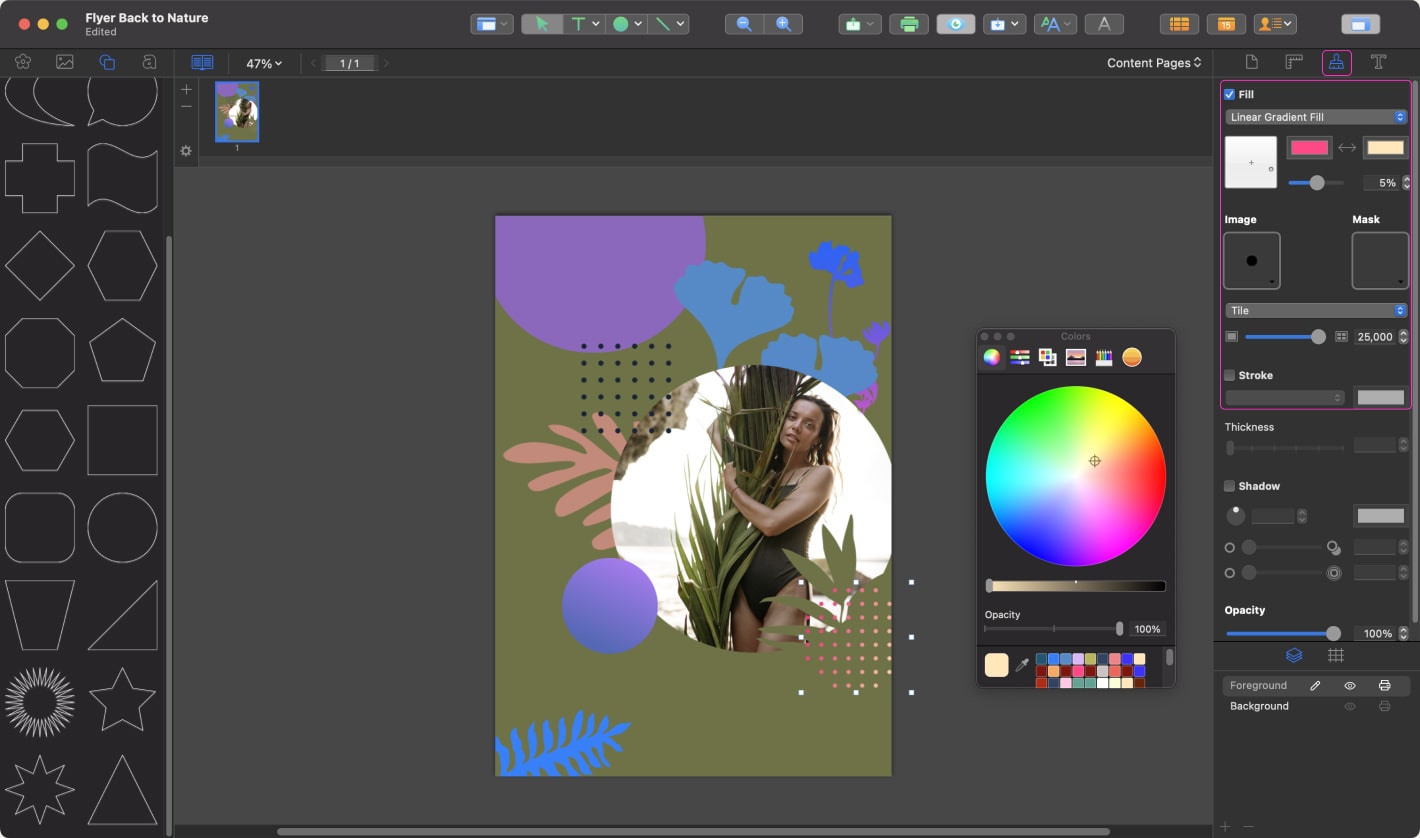
Select the last circle smart shape and create a pattern using the same method as described in Step 14. Add the pink-yellow gradient using the same method as described in Step 10.
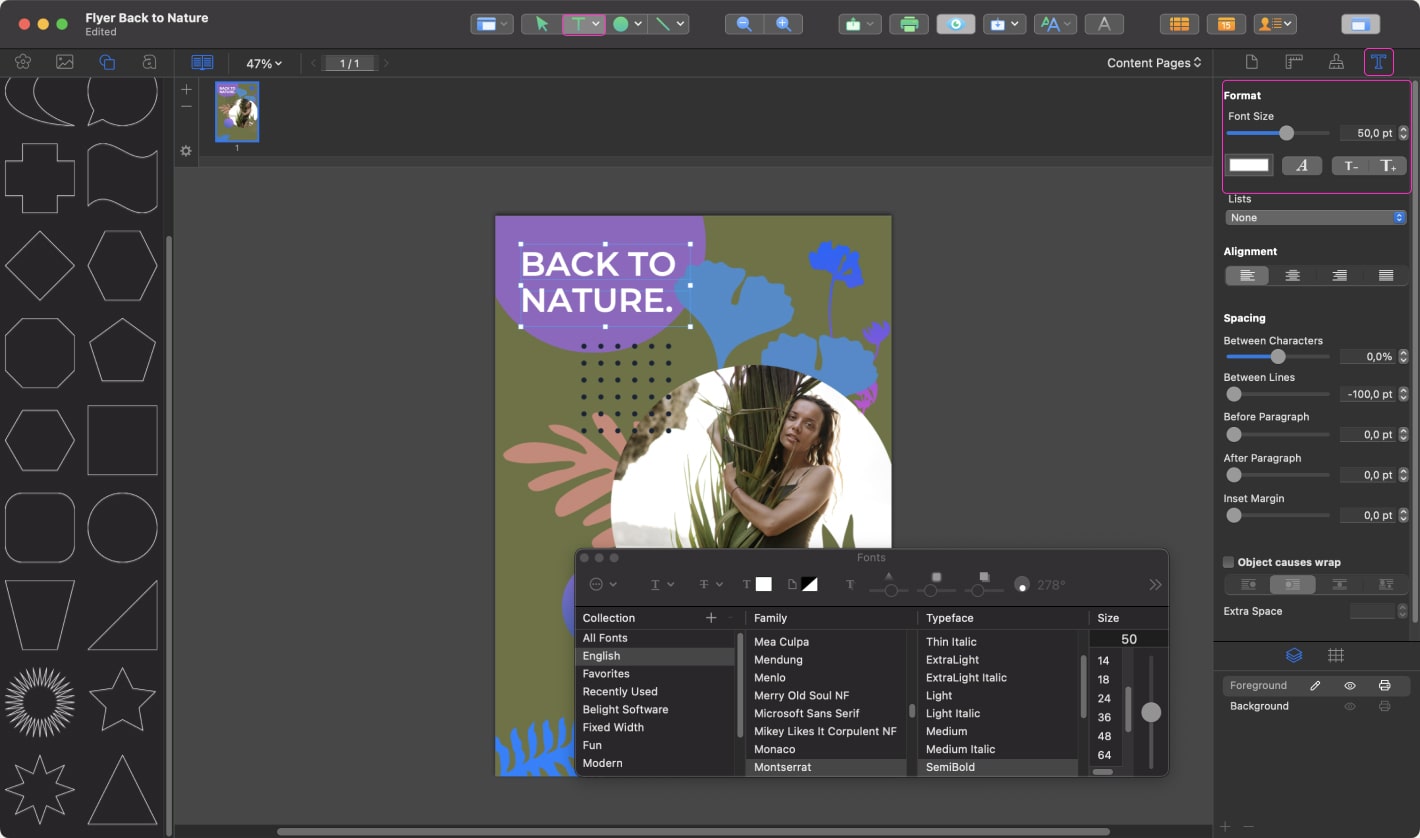
It’s now time to add some text. Click the Text icon on the Toolbar. On the canvas, click and drag to create a text box. Then go to Inspector > Text and press the “A” button. Set the font size to 50 pt. The font in the template is Montserrat (SemiBold), which can be downloaded from Google Fonts. Set up the white color for the text bох.
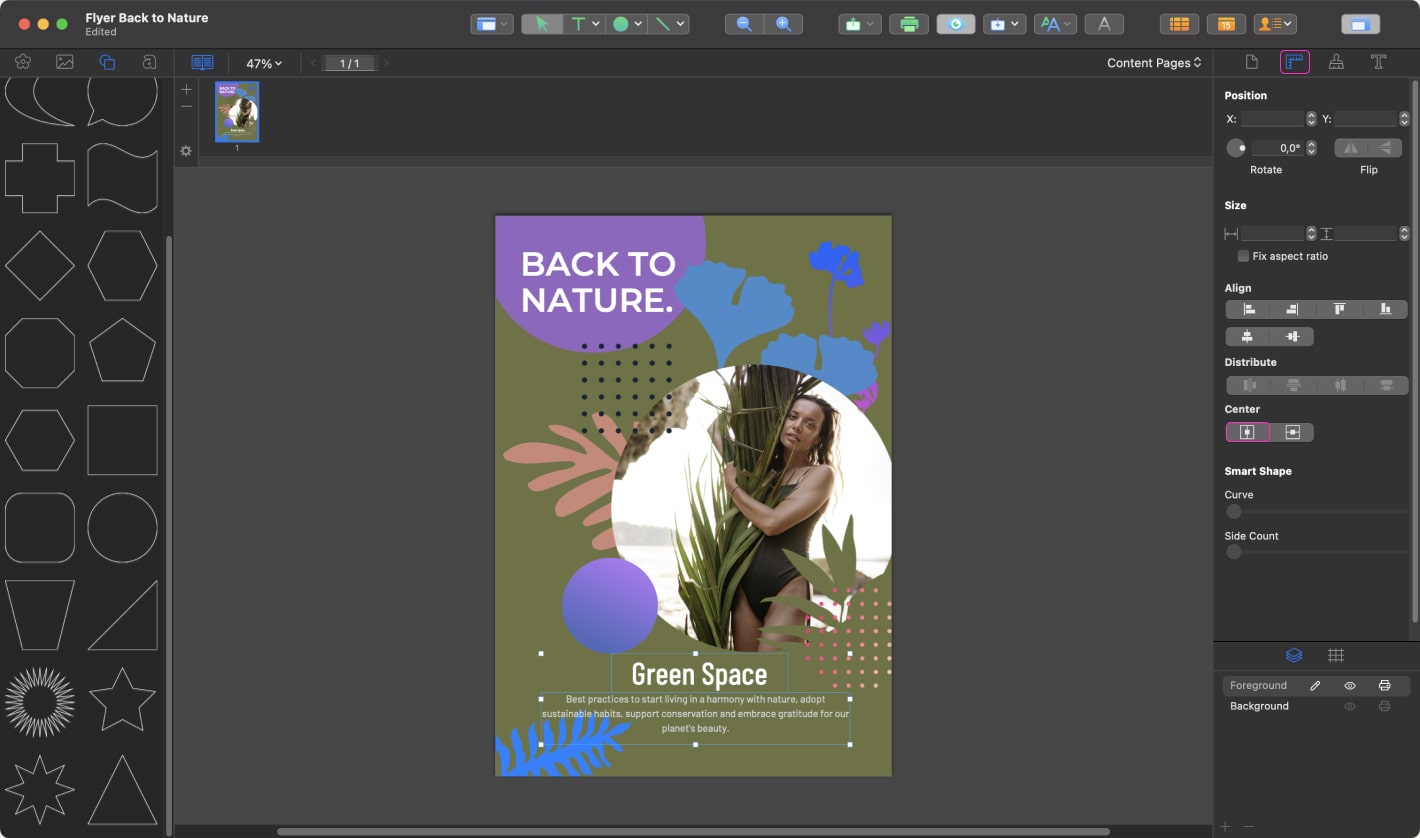
Add two more text boxes the same way using the following text parameters:
- Title—font Barlow Condensed (Medium) 47 pt;
- Paragraph—font Barlow (Regular) 15 pt.
Once you are ready, select both text boxes, go to Inspector > Geometry and click the left Center icon. Now the selected objects are moved horizontally to the center of the canvas.
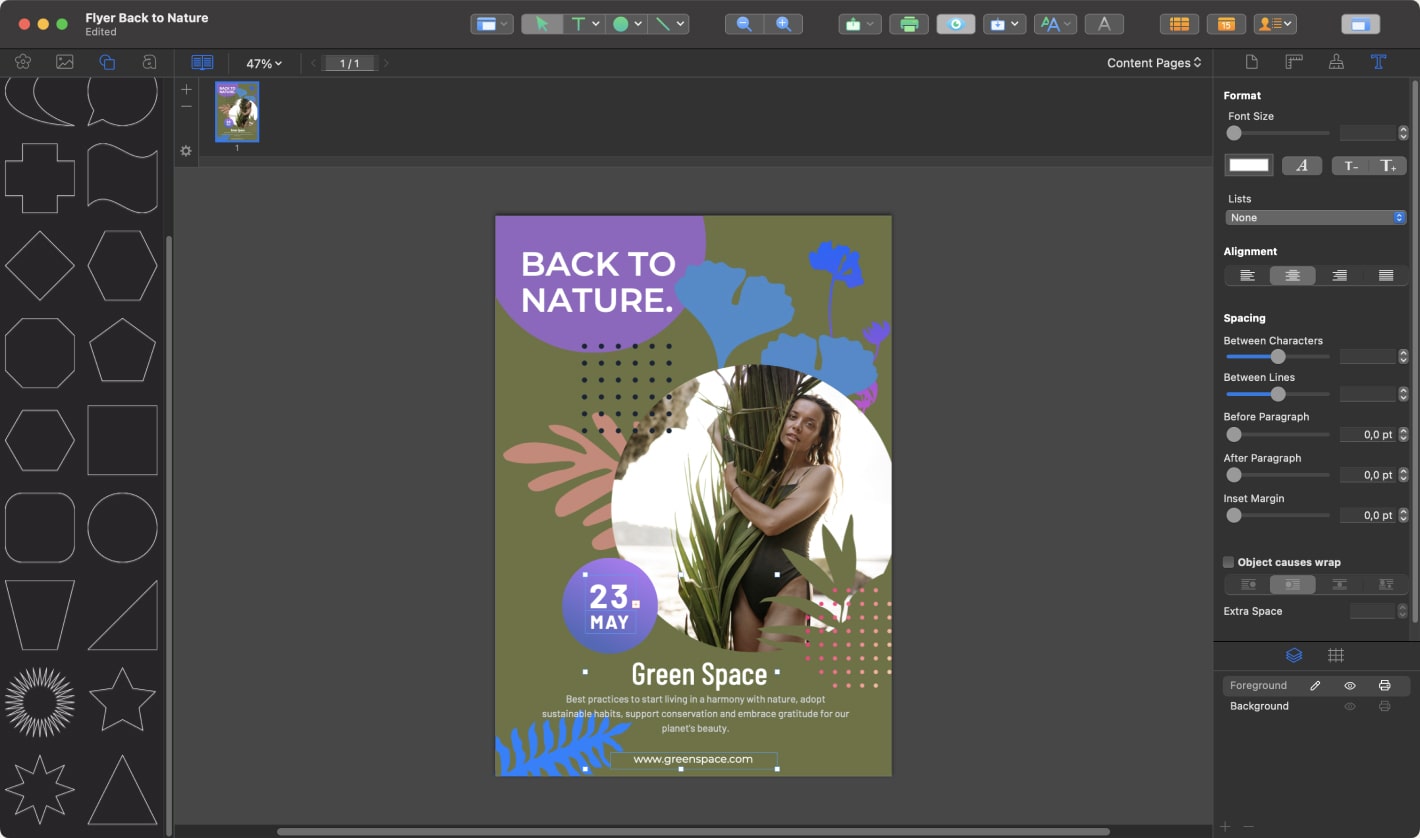
Don’t forget to add the date and contact information. Using the Plantagenet Barlow font for the date and Montserrat font for the website address, place the text in the same position as on the screenshot. You can experiment with sizes and/or thickness of these two typefaces.
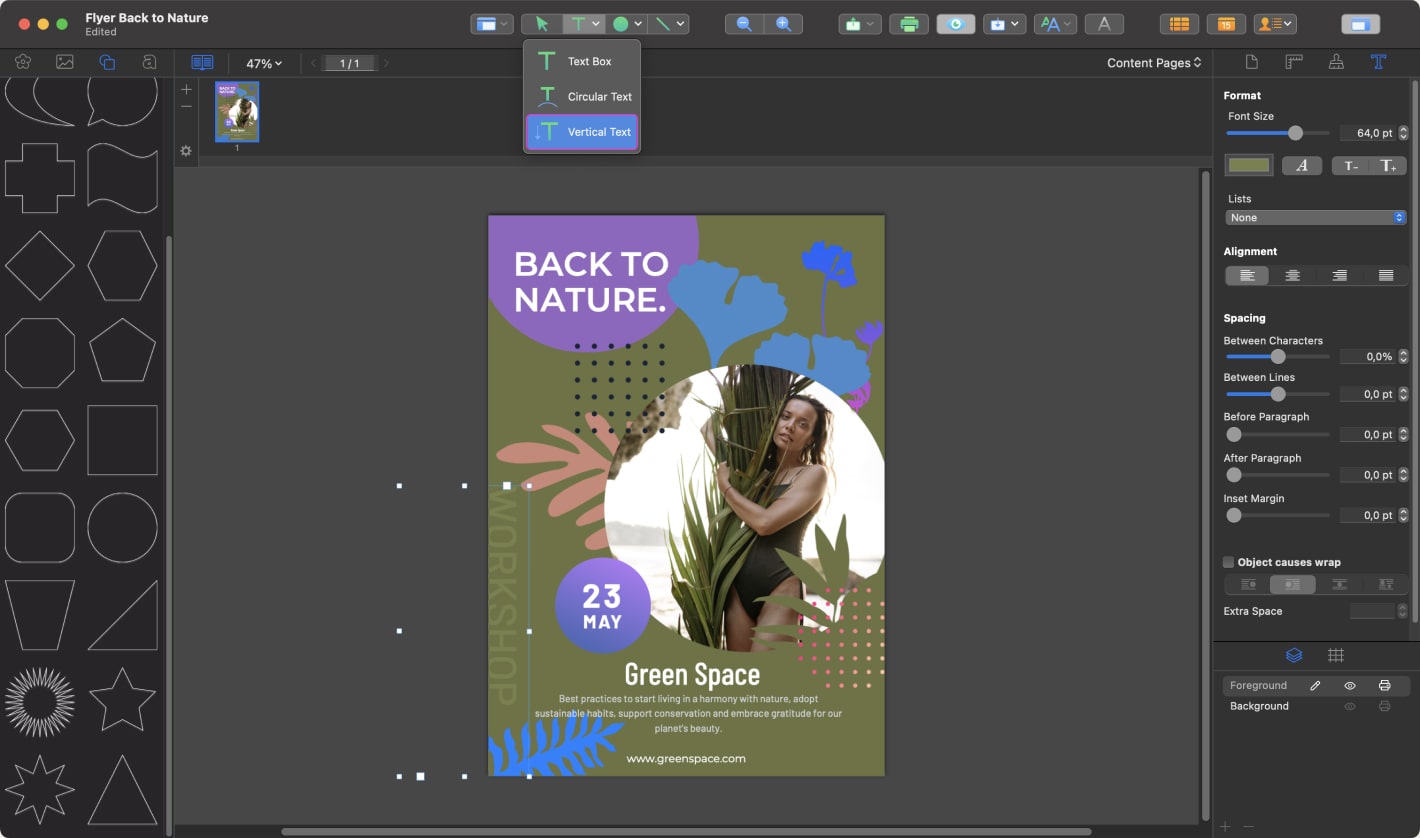
At the end, click the small arrow in the Text icon on the Toolbar. Choose the “Vertical Text” from the dropdown menu. Create vertical text “WORKSHOP” using Montsserat typeface 64 pt and place it the same way as on the screenshot.
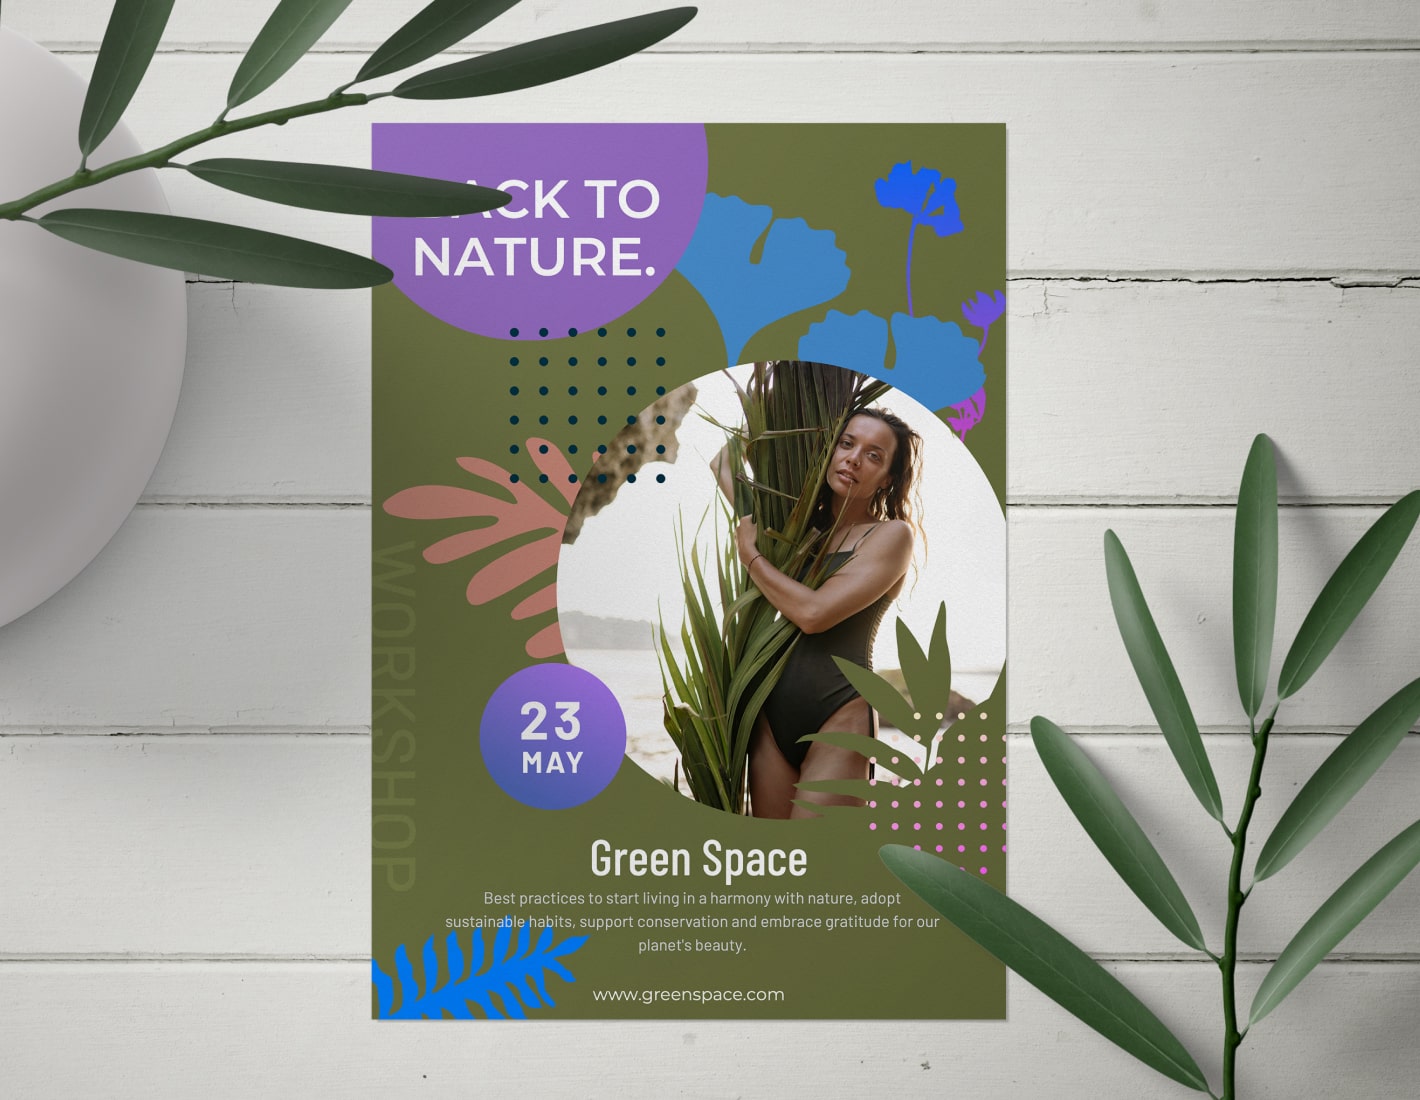
Completed Project