Editing Documents
Linked Text Boxes
Linked Text Boxes and Flowing Text
You can create a series of text boxes linked together. Text in such boxes can flow from one box to another. When the text cannot fit in the first text box, the rest of it will go to the following text box(es). If you resize one of linked text boxes making it contain a bigger or smaller portion of the text, the text in the following text boxes will rearrange correspondingly.
Linked text boxes can be used to create multi-column text. Also, linked text boxes are used to create multi-page documents where text continues over several pages.
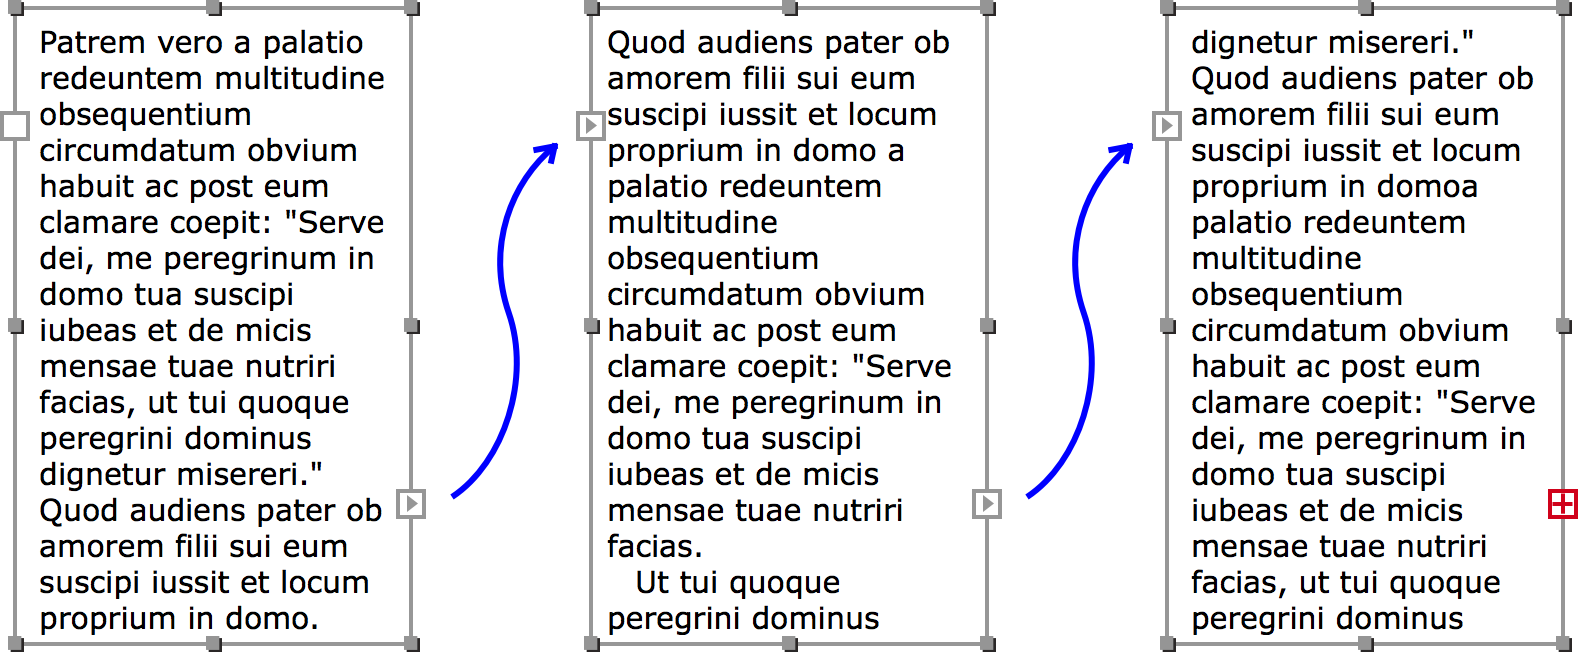
Supposing that we have tree linked text boxes as in the picture, text begins in the left text box, and then continues in the second and third ones. So, in relation to the text box in the middle, the left text box is preceding, and the right one is following. Note that the linking lines shown in the picture are not displayed by the program.
Any text box can have one linked text box before it (preceding) and another one after it (following). The program doesn't allow you to link the first and last text boxes together, and make a loop.
Only regular text boxes can be linked. Vertical and circular text boxes don't support this feature.
Adding Linked Text Boxes
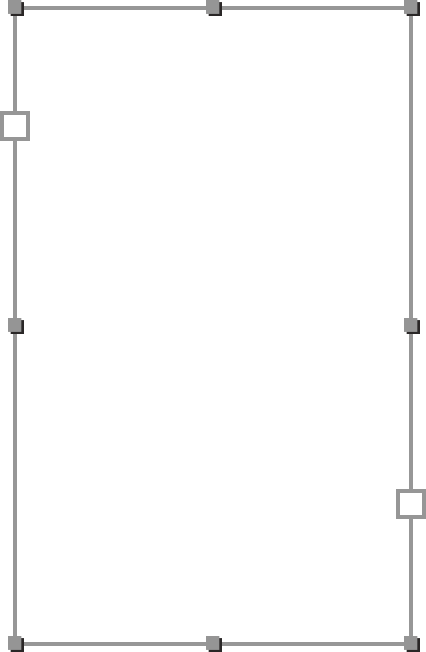
There are two square controls on the text box frame in addition to the regular resize handles. They are visible when a text box is selected. Let's call these controls linking controls. They will be described in detail further. Using these controls, you can add linked text boxes before and after a selected text box.
To add a linked text box after the current one, click on the right hand linking control. This activates the text box adding tool. Then click on the page to create a text box of the default size. While the text box adding tool is activated, you can also draw a new text box.
In order to add a linked text box before the current, use the left hand control.
It is possible to add a linked text box when the left and right controls are empty inside, or when the right control has a red plus icon.
Text Box Linking Controls
The two text box controls are located on the left and right sides of the text box frame. By default, they look like white squares. They may have an icon inside depending on their state.
The linking controls are visible when a text box is selected.
The controls indicate the state of the text box. By clicking on these controls, you can activate the tool to add a linked text box, or another tool to link text boxes.
| Control | State | Meaning of the control state | Actions |
|---|---|---|---|
| Left | 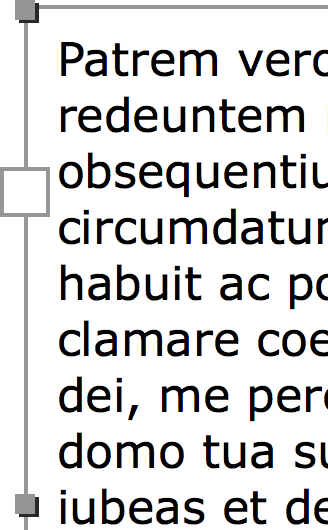 Blank |
A blank control on the left side means that the text begins in this text box. The text box has no linked text boxes before it. |
By clicking on this control, you can either add a linked text box, or link the current text box with another one. In both cases, a second text box will become the first one in a series of linked text boxes. |
 Arrow inside |
An arrow means that the text begins in another text box and continues in the current one. The text box is one of multiple boxes in a series, but not the first one. |
No actions. | |
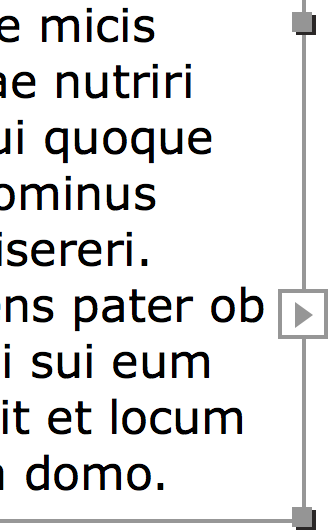
| Right |  Blank |
A blank control to the lower right means that the text ends in the current text box. There is enough space for text in the box. The text box has no linked text boxes after it. |
By clicking on this control, you can either add a linked text box, or link the current text box with another one. In both cases, a second text box will become the last one in a series of linked text boxes. |
 Arrow outside |
An arrow means that the text continues in another text box linked to the current one. The text box is one of multiple boxes in a series, but not the last one. |
No actions. | |
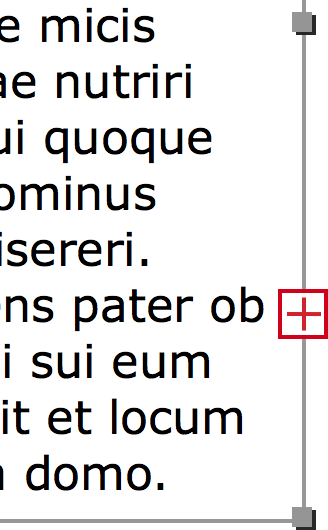 Red plus |
A red plus means that there is not enough space to show all of the text in the current text box. The text box is a single one or the last one in a series. |
By clicking on this control, you can either add a linked text box, or link the current text box with another one. In both cases, a second text box will become the last one in a series of linked text boxes. The invisible portion of the text will appear in the new box. |
Linking and Unlinking Text Boxes
In order to link two text boxes, click on the right linking control of one text box to activate the linking tool. Then click on a second text box. The second text box will be linked after the first one. Notice that the program cannot merge text when you link text boxes with text inside. Text from the second text box will be lost.
To link the second text box before the first one, you should activate the linking tool by clicking on the left control of the first text box. In this case, text of the second box will be preserved, while text of the first box will disappear.
While the linking tool is activated, you can move the cursor over other text boxes and see whether linking is possible. This will be indicated by an arrow with a chain icon.
If you click on an empty place or if linking is not possible, the program will add a new text box linked to the first one.
You can also use this method to add one more text box to a group of already linked text boxes. A new text box can be added either to the beginning or end of the sequence but never in the middle.
To unlink a text box from the following one, right-click on it and select the Unlink Text Box command from the context menu. And only if you call the command by clicking on the last text box, it will be unlinked from the preceding one.
If you unlink two text boxes containing text, all of the text will appear in the text box which originally contained the beginning of the text.