
Color, Gradient and Image Fill
Gradients
To fill an object with a gradient, you can use the Color panel.
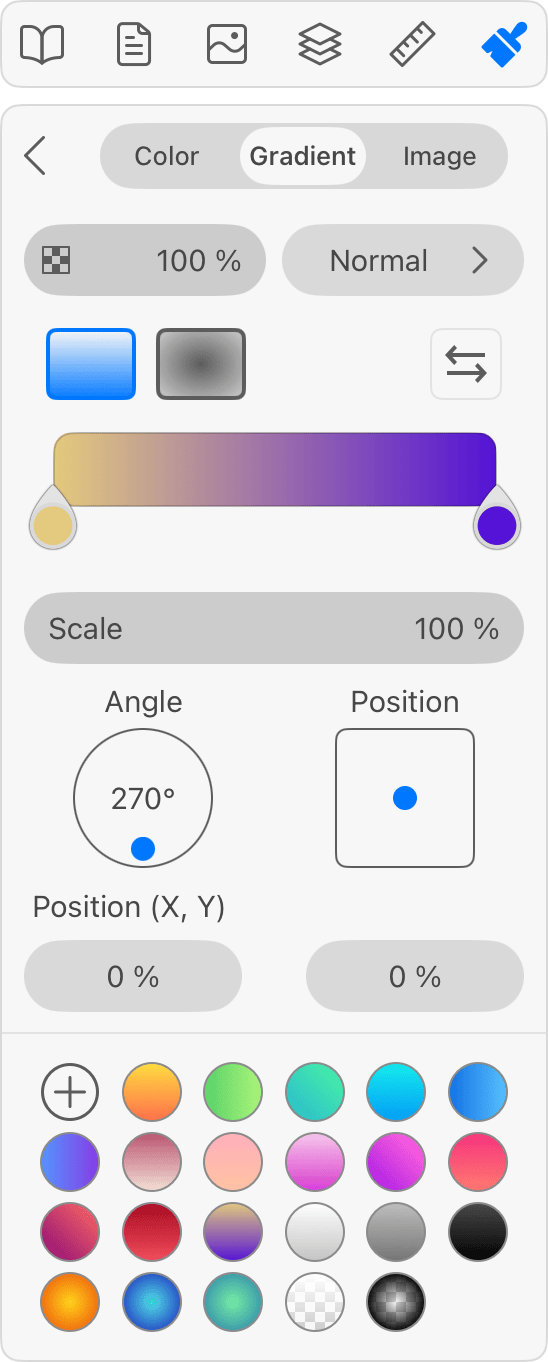
Add Gradient
When you open the Gradient section of the Color panel, you automatically apply a default gradient to the currently selected object.
Adjust Gradient Colors
Any gradient has two predefined colors at its ends. Let's call such predefined colors "base colors". Base colors are shown inside circles. The default gradient has two base colors. We'll see later how to add more.
All colors in the middle are generated by the software to create a smooth transition between the base colors.
To add an intermediate base color, tap the gradient preview in the panel.
You can drag colors in order to change the distribution of colors over the given area.
To delete an intermediate color, drag it off the preview area.
Only intermediate base colors can be deleted.
In order to change a base color, tap on the corresponding circle. Then use a simplified version of the Color panel to select a new color.
Drag circles that define the location of base colors to make different color tints take up more or less space.
You can apply a predefined gradient by choosing one in the swatch library. Gradient swatches are used in the same way as color swatches.
Adjust Gradient Position
The Scale parameter lets you change the distance between the base colors at the ends.
Use the Angle tool to change the direction of the gradient.
To move the whole gradient relative to the object, use the square control or change the X and Y values.