Step 1: Preparation Stage
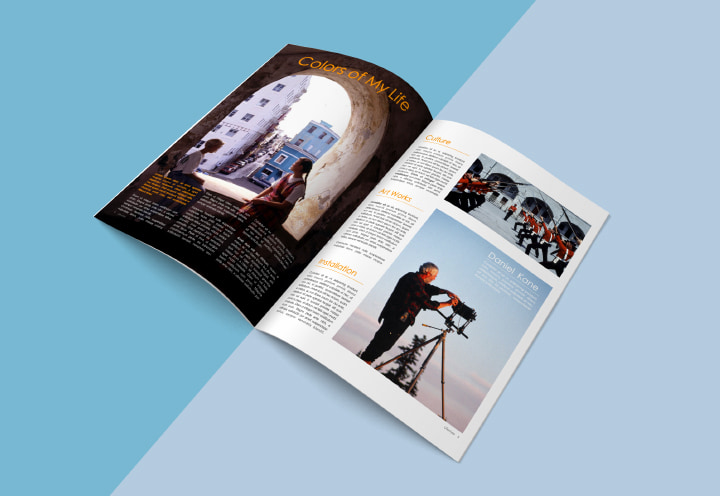
The standard booklet is US letter-size (8.5 × 11″), but there is an opportunity to modify it with the help of a special applications. Creating a booklet on your Mac is much easier than it may seem. But, let’s take this one step at a time.
Obviously, no solution will provide you with a ready-made unique booklet design. Naturally, programs such as Swift Publisher have several helpful templates, but it is always better to develop a booklet project, binding it with the specifications of your brand.
First of all, you need to decide on the aim of your booklet: informative, advertising or some other purpose. This will give you a clear understanding of what elements should be included and which are better to omit and avoid.
It is also important to remember that too good can be too much. There are various styles in which you can create your booklet, including minimalism, vintage, etc. In this case, everything depends on your creativity and the booklet’s purpose.
Do not forget your target audience. While preparing these informative pages, take into consideration their age, gender, occupation, interests and moods. This will greatly help you to choose the right direction.
You can combine several styles and play with the contrast of images and text. Before making booklets, you should also investigate the opportunities of the solution. For instance, Swift Publisher’s professional and easily accessible tools will help you create and print a PDF booklet on your Mac.
Would you like to find out how to make a booklet on your Mac and avoid typical mistakes? Keep reading!
Step 2: Double Check to Be Confident
You have finally prepared your design and can’t wait to find out how to print your booklet in PDF. Take your time. It is necessary to check everything twice, or even three times, before printing. Otherwise, the results can be disappointing.
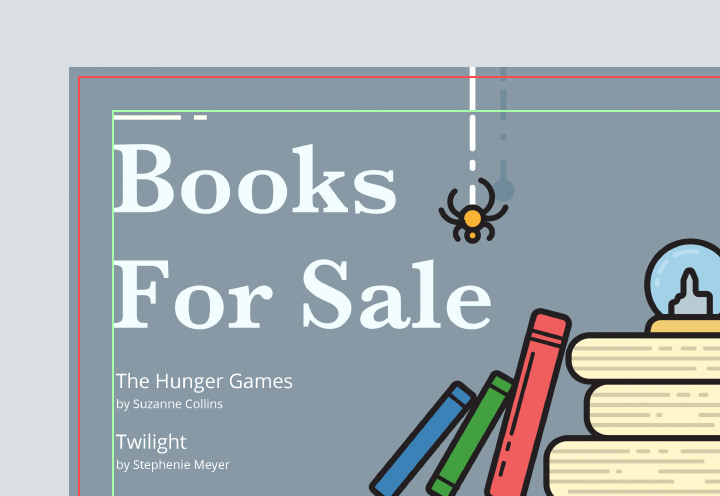
Pay Attention to Crop Marks
When placed improperly or missed completely, these tiny elements can become a huge headache. They are necessary to accurately print your booklets and prevent appearance issues. Typically, the paper you choose should be a bigger size than the original artwork. Crop marks are intended to be a guide, allowing a customer to “trim” the paper to the required dimensions.
Bleeds Are Second to None
By using bleeds, you have your artwork printed with complete ink coverage to the paper’s edge as a final result. If your artwork, or a part of it, reaches the edge, you should accommodate the bleeds. In this case, you are to extend the design beyond the crop marks no less than ⅛″.
Booklet Size
At the design stage, you have to decide on the size of your booklet. If you need something different from a standard size, it would be better to initially work your design to match the necessary dimensions. Let us be clear: a 6 × 9” printout of booklet design created in a standard size won’t look exactly the same as it does on your computer screen . The same applies to printing photos or images.
Suite of Colors
First of all, you should think about what colors to use and how to match them to appear vivid and bright. It is a psychological trick: people subconsciously make choices in favor of a particular product since they are impressed by the color. For instance, people usually associate a red color with something warm: sun, power, love, fire, life, etc. In light of this, the color design of your booklet will become an extra source of information and a message to influence your target audience.
Secondly, it is worth memorizing one simple but very important aspect of how to print a booklet on your Mac. On your monitor, the colors you see belong to RGB (referring to red-green-blue color mixes). However, printers use a different color creation method—CMYK (cyan-magenta-yellow-black mixture of colors). Be attentive and set up the correct color mode in accordance with the chosen color process technique.
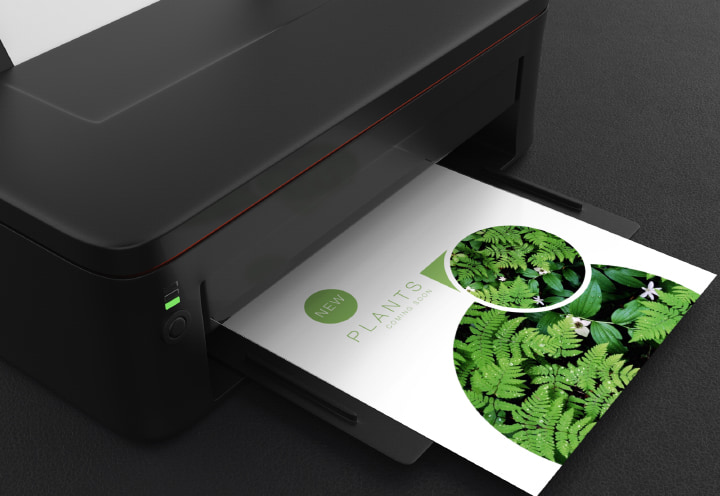
High-Quality Images
This is a critical point: if you want to have a gorgeous booklet as a result of following all the steps of how to print a booklet on a Mac, you should choose images with rich resolution—the image's DPI (dots per inch) should be at least 300.
Creative Text is not Everything You Need
A must-to-do stage is the examination of your file for any errors. Usually, people do not stop printing with a single booklet: they need many more. That is why it is critical to check your work for any grammatical, stylistic or spelling mistakes—they can prove to be very damaging!
Step 3: How to Print a Booklet on a Mac
When it comes to printing your treasured booklets, you have two options. Utilize a professional printing service or do it on your own. In the latter case, you need to have a Mac, a printer with the correct size paper and a solution installed on your computer.
We highly recommend choosing Swift Publisher. With this program, you can adjust the size of your design draft to the paper you want. Moreover, Swift Publisher is an intuitive application in which the customers can find the tools easily, helping to avoid questions like “How to create a booklet on a Mac?” or others.
Lifesaver for Booklets: Swift Publisher
Overall, Swift Publisher is an advanced program for creating numerous design projects, including websites, flyers, brochures, etc. With this software, you will not only learn how to print a PDF as a booklet on your Mac, but also have a clear understanding how your final product will look.
In Swift Publisher, you can customize bleeds and crop marks, improve the image resolution and choose from several text fonts and formats. All in all, the number of tools will greatly impress even the most professional users.
Having said all this, it is always easier to learn for yourself. Just follow the link below and see how powerful one solution can be for multiple aims.