How to Make Invitations on a Mac
Preparations for holidays often result in a huge headache. But, there are several ways you can save money and your nerve cells from extra stress. One of them is to prepare invitations on your own. Handmade, customized invitations will please your relatives and friends, showing how much you care about them.
A Bit of General Information at First
There are plenty of options on how to invite friends and family to a wedding or celebration, including:
- send a paper postcard or invitation of an unusual form;
- record a creative short video;
- invite via social media channels or email;
- give them a call if your guest list is short.
It’s your choice which option to choose, but in this article we will review how to create and print a standard invitation which could be printed or sent by email as a PDF. Are you ready to find out how to design invitations on a Mac? Let’s get started!
Choice of Relevant Tools
The design of the invitation is the first thing to consider. In order to create a beautiful design, you need to choose the general concept of the card, what elements it would include, etc.
Specific design elements can be implemented with the help of special tools, so you need to search for an effective and productive suite.
If you want to create a bright and eye-catching invitation, the Swift Publisher suite of tools will definitely come in handy.
First of all, the program contains more than 500 templates you can use to create invitations for several occasions, and you can forget about questions like “how to make a birthday invitation on a Mac” or “how to make baby shower invitations on a Mac.”
All of them are customizable, so you can create and make your own masterpiece. In addition, numerous label templates are prepared by Neato, Avery and other giant companies for your needs.
Let us be more precise. With the help of the Dynamic Data Fields tool, users are welcome to insert data from a text file (e.g., your guest list, dress code information, etc.). This will eliminate the potential for mistakes occurring and simplify the card’s production.
It is also possible to modify the image with the help of thousands of clip art images, as well as Smart Shapes. In addition, 2D and 3D headings are what you need to title an invitation and make it self-explanatory.
Invitation Content
Of course, each type of invitation may include some specific elements and design trends. By knowing the C.R.A.P. principle, you can create an invitation masterpiece. C.R.A.P. stands for:
- ContrastAllows you to focus on specific details.,
- RepetitionTo make separate design elements part of the general concept of the card.,
- AlignmentAllows you to follow a specific design structure.,
- ProximityOrientation of the elements to one other..
For instance, in order to create a wedding invitation, you should include basic information like:
- names of bride and groom;
- names of the guests;
- date and time of the wedding ceremony;
- date and time of the wedding reception;
- other details of the wedding program (if necessary);
- wedding style (if necessary);
- dress code.

Don’t forget about the document’s structure. Everything should be mentioned in logical order (for instance, it is not appropriate to mention the place of the occasion before the name of the invited guest). Overall, you need to mention who the invitation is from, the time of the event and the location (all the additional details after the general information). You can control the placement of objects using the program’s adjustable layout guides.
Any invitation should focus on the individual person, not just “to whom it may concern.” The text of the invitation should make your guests eager to attend your celebration. You should express your respect and other kind feelings to the addressee so that he or she feels like a welcomed and honored guest.
To help you design more charming invitations, Swift Publisher offers more than 100 fonts so you can style your invitation in any way you’d like.
How to Design an Invitation on a Mac: a Step-by-Step Guide
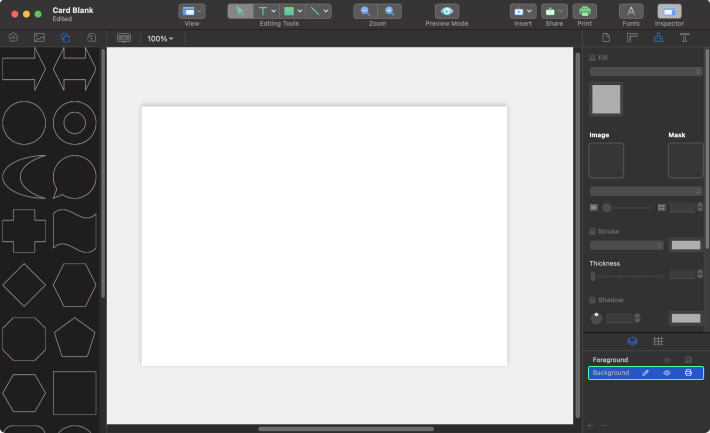
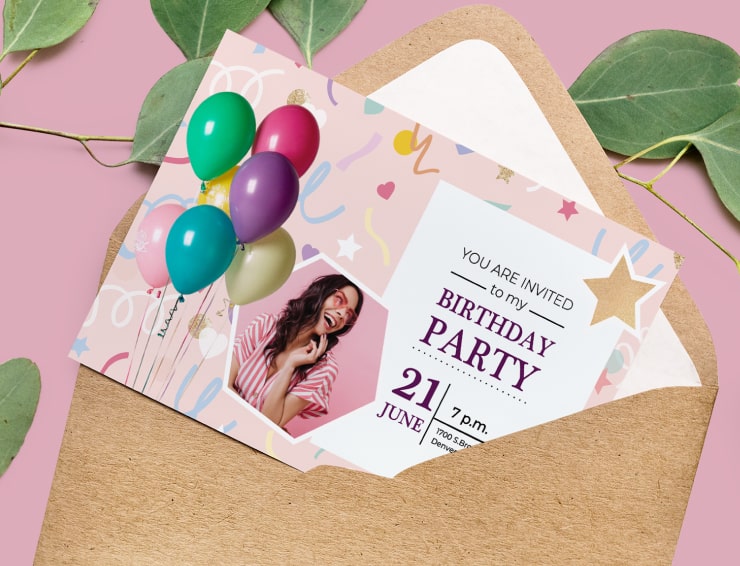
Open Swift Publisher, select A6 Postcard in the “CARDS” category, and press the Choose button on the right bottom side of the interface.

On the right bottom side of the Inspector, select the Background layer. If you want, you can rename this layer by double clicking on it.
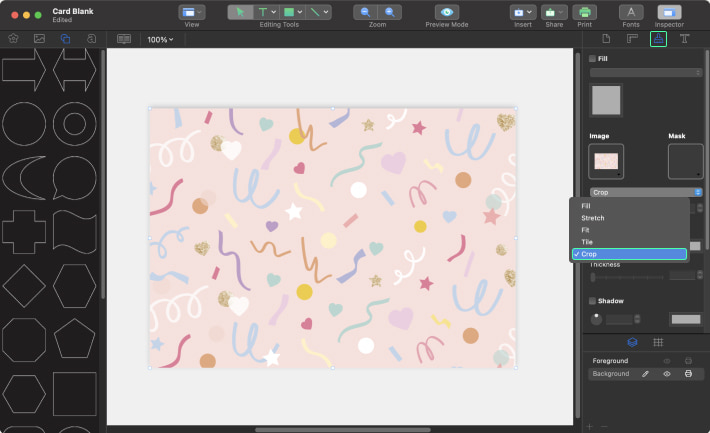
Let’s import your background images.
There are two ways to do that. The easiest way is to drag and drop the image directly onto the canvas. Another way is to use the Insert > Image > From File menu.
Note that your image should have a resolution of at least 300 dpi. After inserting the image, let’s crop it by the artboard. In the Inspector, go to Appearance, choose “Crop” in the dropdown panel, and crop your image like on the screenshot. Or you can resize your image on the artboard by holding the Option key to scale the picture proportionally.
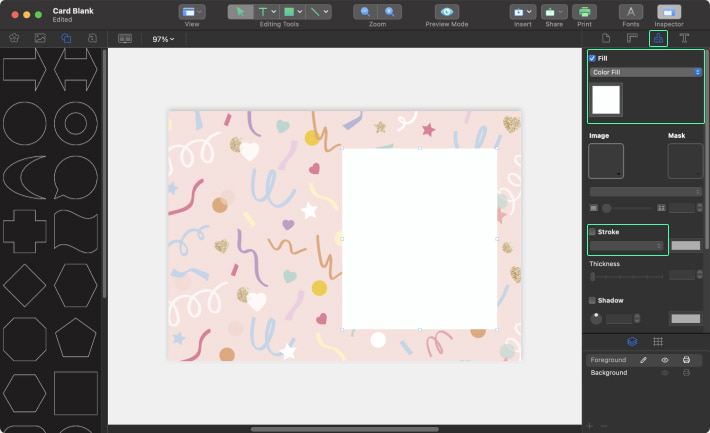
On the right bottom side of the Inspector, select the Foreground layer. Go to the Source Panel on the left side of the interface, select the Smart Shapes icon and choose the Square shape.
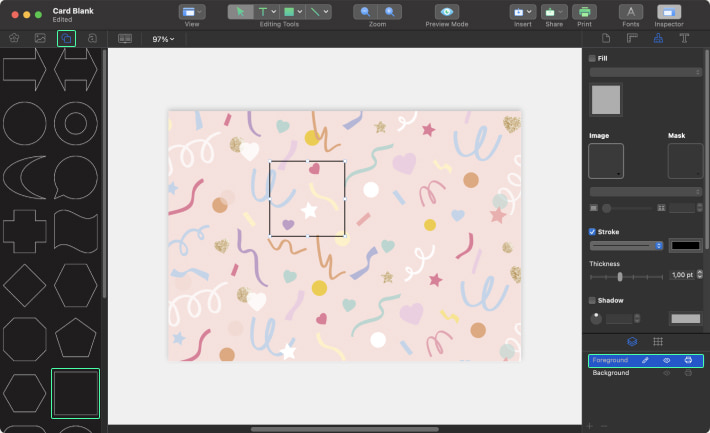
In the Inspector, go to Appearance and choose white for the Color Fill, uncheck the Stroke checkbox and resize it like in the screenshot.
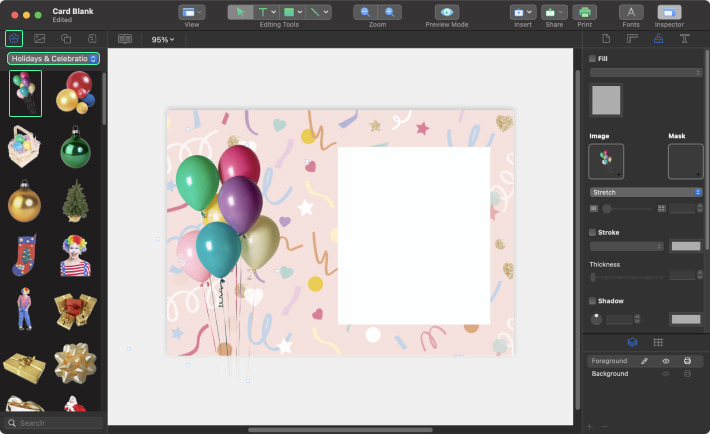
Go to the Source Panel on the left side of the interface and select the Clipart Collection icon. Choose clipart with balloons in the chapter Holidays & Celebration. Resize the clipart holding the Option key and place it on the right side of the card.
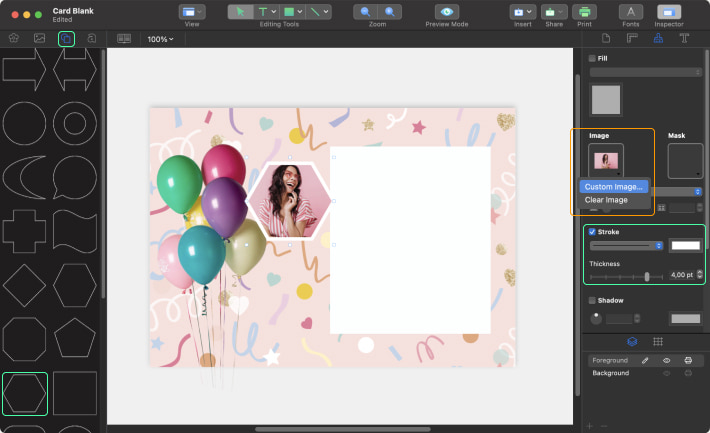
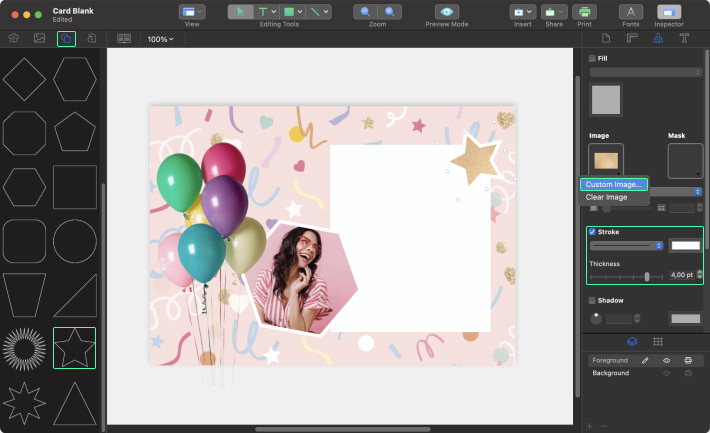
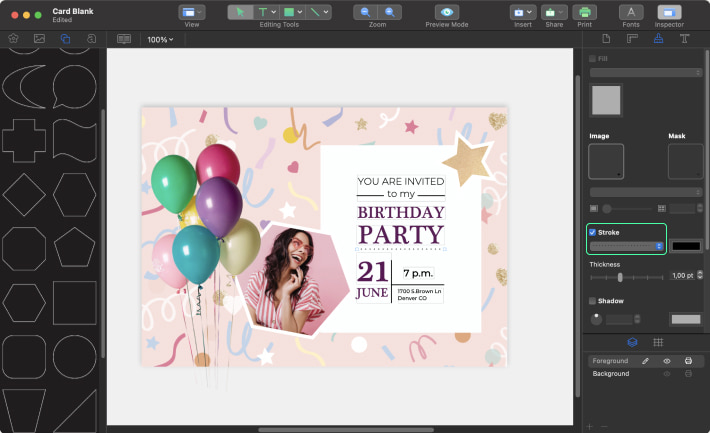
Go to the Source Panel on the left side of the interface and select the Smart Shapes icon. Choose the Polygon shape and add a white stroke with a thickness of 4 pt.
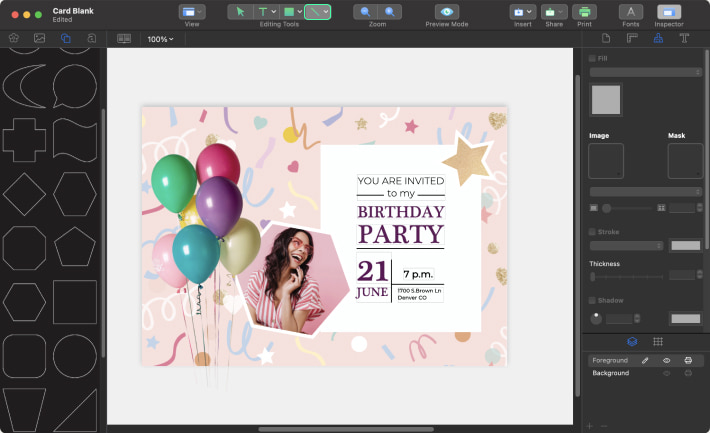
Let’s insert an image inside the Polygon. In the Inspector, select the Image (location is marked with an orange outline rectangle on the screenshot), choose “Custom Image” in the dropdown panel and insert the picture from your computer.
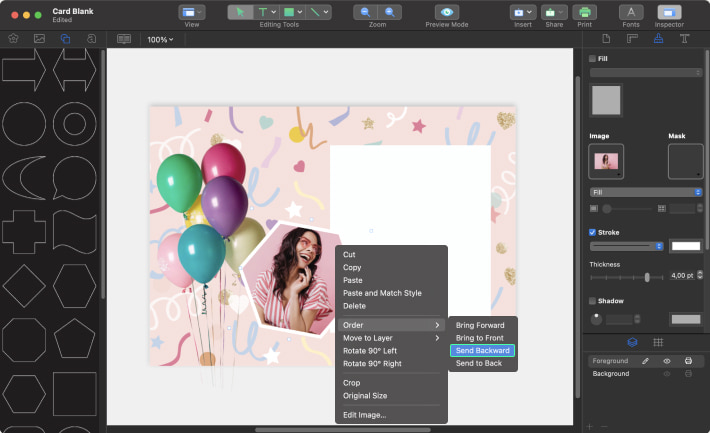
Resize the Polygon holding Option and place it the same way as in the screenshot. Right click on the shape and select from the context menu Order > Send Backward.
Deselect the Polygon shape. Using the Smart Shapes icon, choose the Star shape and add a white stroke with a thickness of 4 pt. Place the image from your computer inside the shape the same as in Step 7. Resize holding the Option key and place it in the right top corner.
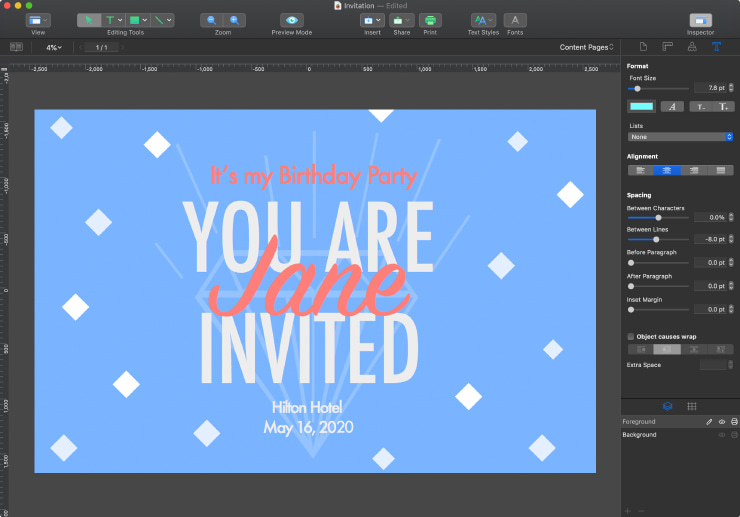
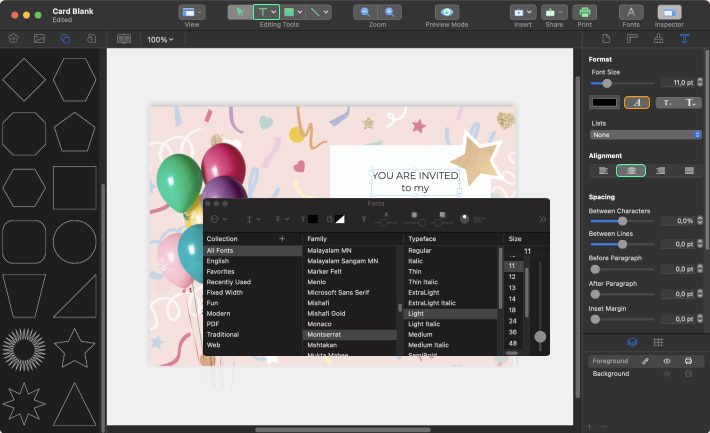
It’s time to add the text. Click the Text icon on the Toolbar. On the canvas, click and drag to create a text box. Then go to Inspector > Text and press the “A” button (location is marked with an orange outline rectangle on the screenshot). Set the font size to 11 pt. Go to the Inspector and align text to center.
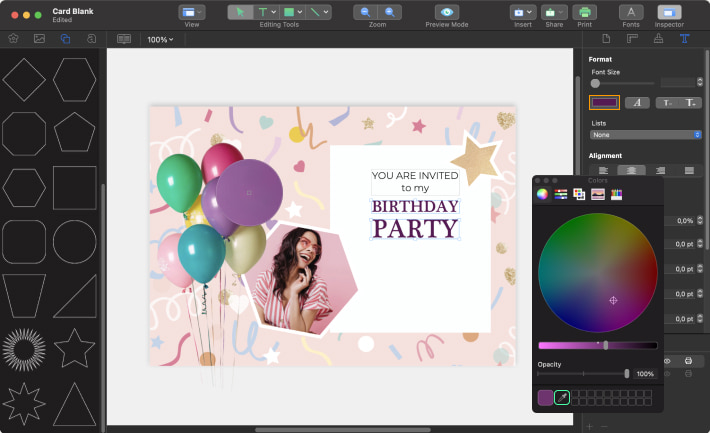
Let’s add more text using the same method described in Step 10 using the next parameters of the text:
- BIRTHDAY—font Plantagenet Cherokee 19 pt;
- PARTY—font Plantagenet Cherokee 30 pt.
To make the text more eye-catching, let’s select the color. Press the color button on the Inspector (location is marked with an orange outline rectangle on the screenshot). Using the Eyedropper tool from the pop-up menu, select the color purple for the balloon.
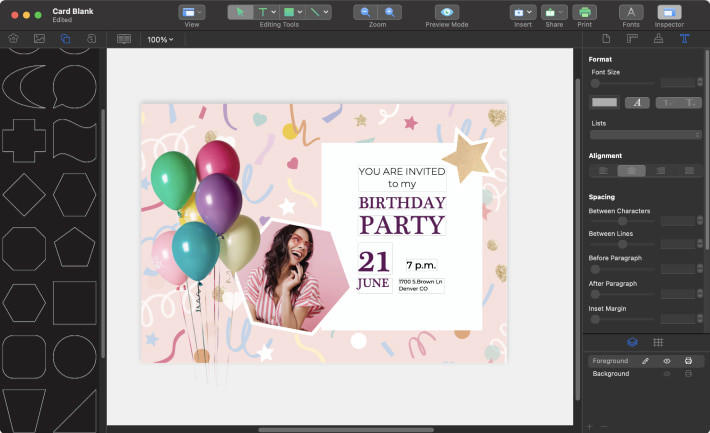
Don’t forget to add the address, time and date of the party. It’s very important. Using the Plantagenet Cherokee font for the date and Montserrat font for the time and address, enter the text in the same position as on the screenshot. You can experiment with sizes and/or thickness of these two typefaces.
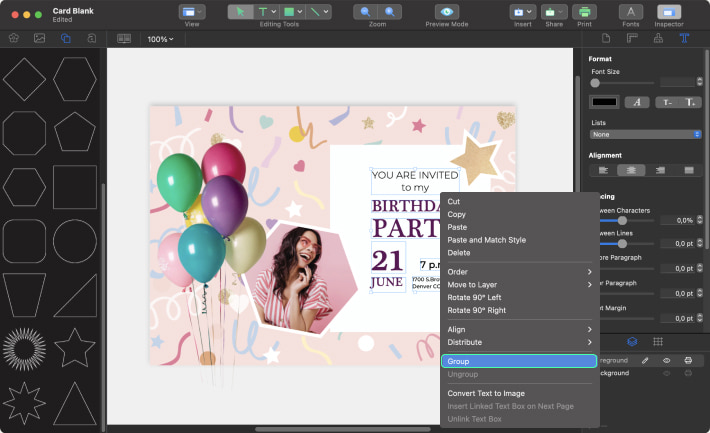
Group the text: holding Shift, select all text blocks in the rectangle. Right click on it and select from the context menu Group.
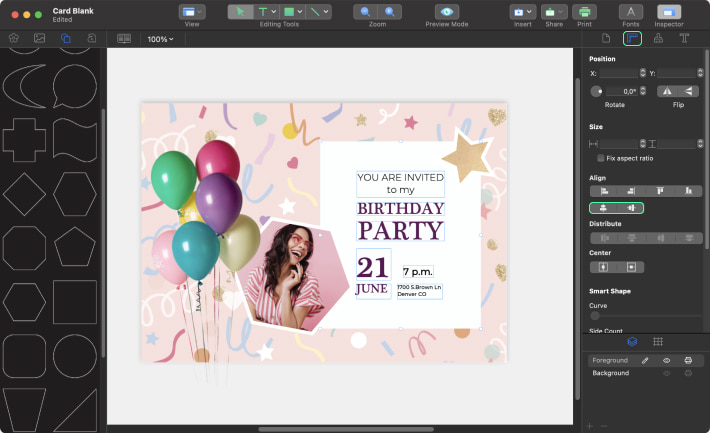
Holding Shift, select the group of text and the white rectangle. To align text according to the white rectangle, go to Geometry and choose the following two actions: “Vertically align the centers of selected objects to their common center” and “Horizontally align the centers of selected objects to their common center” in the Align Panel.
Click the Line Tool icon on the Toolbar. Create the decorative, dividing lines between text to make it look more appealing.
Select the line that you created under the text “PARTY”. Go to the Inspector and choose the dotted line from the Stroke drop-down menu.
Publishing a Final Product
After creating the invitation, you need to print it. Here you have two options: to print your invitations at home, if you have a Mac, printer and paper, or print them at the print shop. In either case, Swift Publisher, with the help of its reliable tools, is a lifesaver.
To print at a print shop, you should:
- Change your color mode to CMYK—the color realization of what you see on your screen and what you see on a printed card may vary. This depends on different color schemes used in the computer system and printer equipment. While the first maintains a red-green-blue mix (RGB), the second functions with the CMYK system (a combination of cyan, magenta, yellow and black colors). Swift Publisher allows you to convert RGB files into CMYK files.
- Turn your font into vector lines with the help of the Text to Curve feature.
- Export your masterpiece to the iCloud or a flash drive. Swift Publisher provides you with numerous export capabilities (e.g., PDF, JPEG, etc.), while allowing you to control the image quality of the final product.