Create Your Own Booklet in Swift Publisher for Mac
Booklets allow you to combine a great amount of structured information with the visual part of the design. What is a booklet anyway? It’s a type of printed product, usually a multi-page document of two or more letter format sheets, folded in half to make a small book.
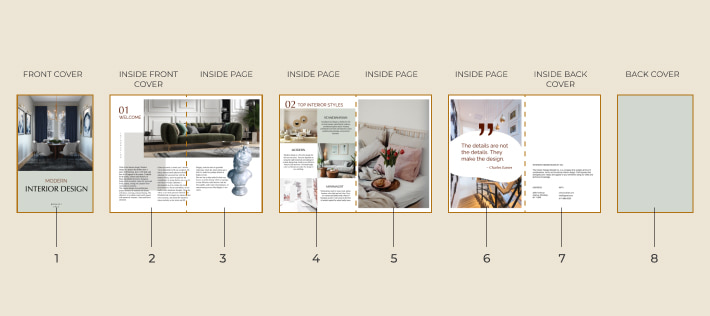
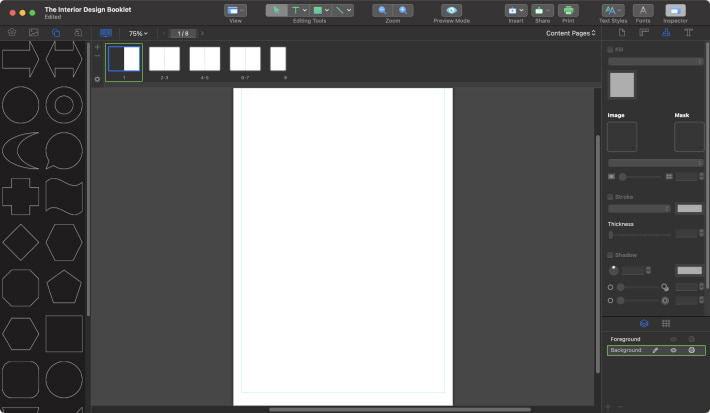
In the picture below, you can see how the 8-page booklet looks. Pages 1 and 8 are the front and back covers, and Pages 2 and 7 are inside the front and back covers.
So, let’s figure out how to do it using our booklet creator for Mac an example of an interior design booklet.
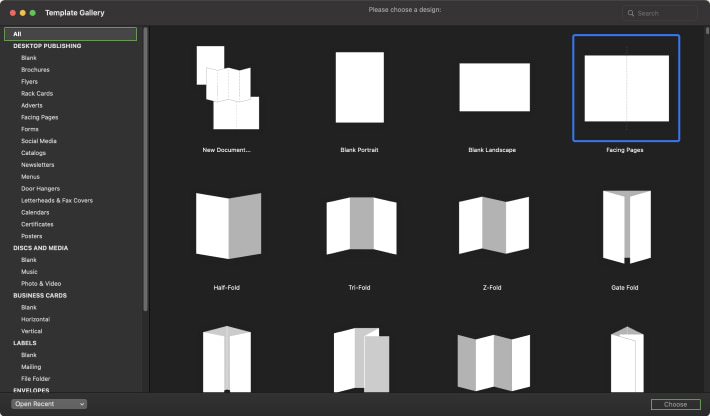
Open Swift Publisher, select the Facing Pages template in the “All” category, and press the “Choose” button in the right bottom corner.
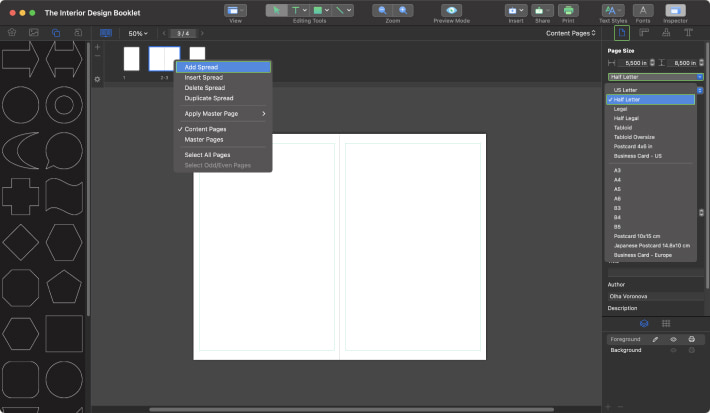
The paper format selected in the Inspector should be half the size of the paper you will print on. In the Inspector, go to Document, and choose Half Letter in the dropdown panel.
Our booklet consists of eight pages, which means that we have to add two more spreads. Click the right button on the panel menu, and choose Add Spread twice in the context menu.
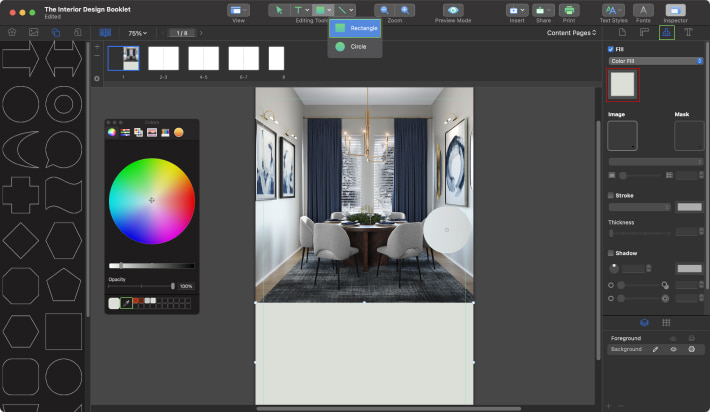
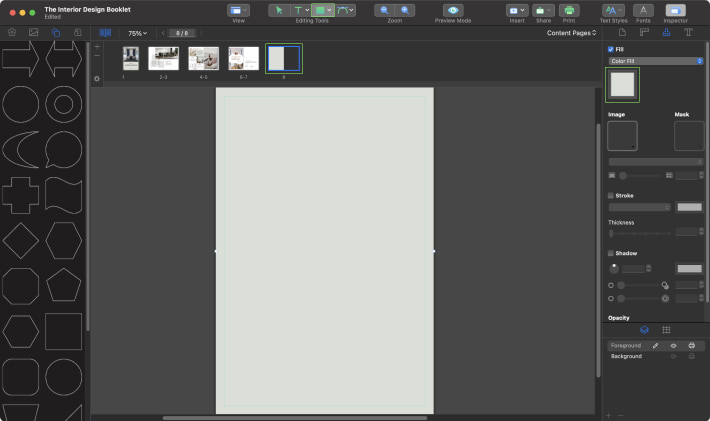
To start a cover design, select the first page of your booklet in the Content Page panel. On the right bottom side of the Inspector, select the Background layer. If you’d like to rename this layer, simply double click on it.
Now let’s create the background. Insert the preferred image. There are two ways to do that. The easiest way is to drag and drop the image directly onto the canvas. Another way is to use the Insert > Image > From File menu. Note that your image should have a resolution of at least 300 dpi, or consult the ideal material for document preparation. After inserting the image, resize it holding down the Option key, and place the picture the same way as in the screenshot.
In order to fill in the rest of the space, select the Rectangle Tool in the Toolbar, and create a rectangle under the image. Go to the Appearance panel and press the color button of the Inspector (its location is marked with a red outline square in the screenshot). Using the Eyedropper tool from the pop-up menu, select the color from the interior walls.
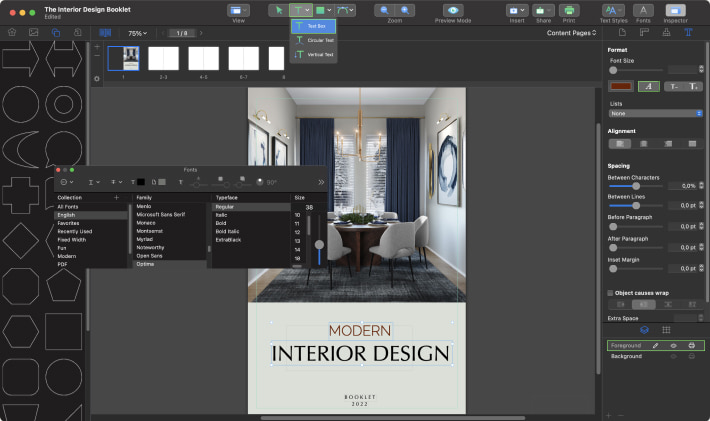
To add a title to the cover, select the Foreground at the bottom of the Inspector panel. Click the Text icon in the Toolbar. On the canvas, click and drag to create a text box. Then go to Inspector > Text and press the A button. Set up the text using the following fonts:
- MODERN—Raleway Light 26 pt;
- INTERIOR DESIGN—Optima Regular 38 pt;
- BOOKLET 2022— Optima Regular 9 pt.
Once you finish setting up the text and place it in the middle of the page, the cover design is ready.
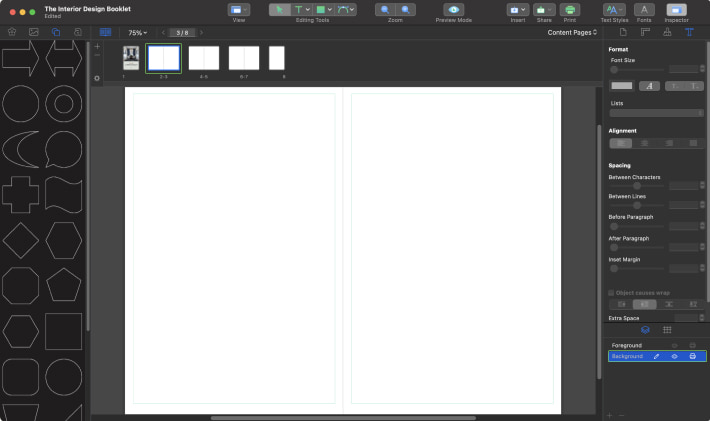
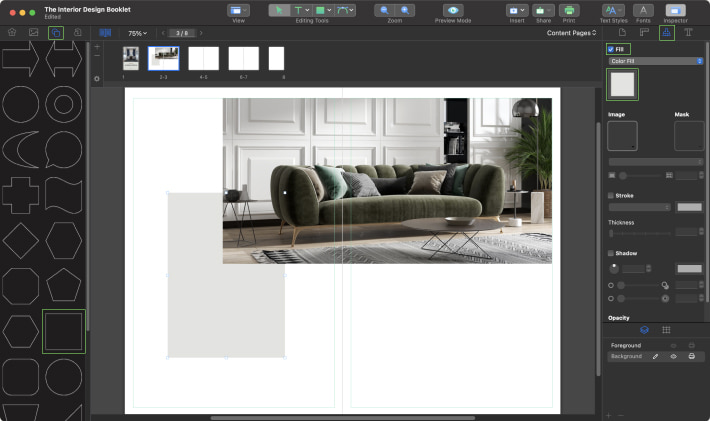
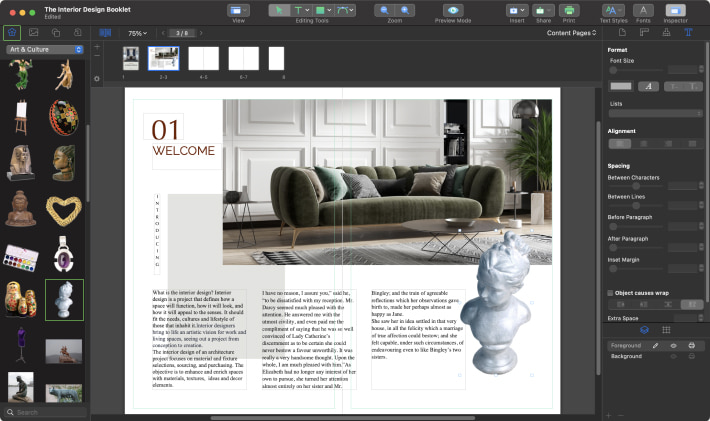
Let’s design the first spread of the booklet. Choose pages 2 and 3 of your booklet in the Content Page panel. On the right bottom side of the Inspector, select the Background layer.
You can decorate the background using different shapes and photos. Insert the photo using the instructions in step 4 and put it in the same position as shown in the screenshot.
Go to the library on the left side of the interface and select the Smart Shapes icon. Choose a rectangle. To set the color, go to the Appearance panel, select the check box Fill, and choose a light gray color that matches the photo.
Switch to the Foreground layer in the Inspector panel. Now it’s time to add an introduction text to your booklet. If you have enough text to divide into blocks, then it is good to explore the option of Linked Text Boxes in Swift Publisher.
Select the Text Box tool and drag out one text frame on the canvas. Insert your text inside the frame. If there is too much text to fit in the frame Out Port, you’ll see a red plus sign (+) at the bottom right. (Its location is marked with a red outline square in the screenshot.)
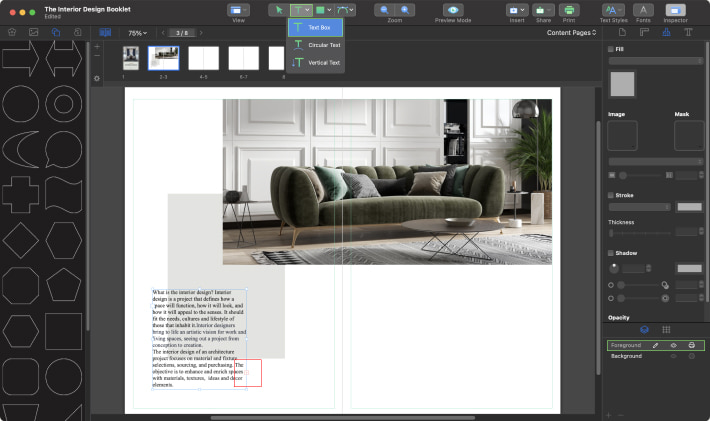
Using the Selection tool, select the text frame, and then click the plus sign (+) to load the next text icon. Position the loaded text icon next to the first text block, and click and drag to create a new text frame. To fit in all the text, we have to create three text boxes.
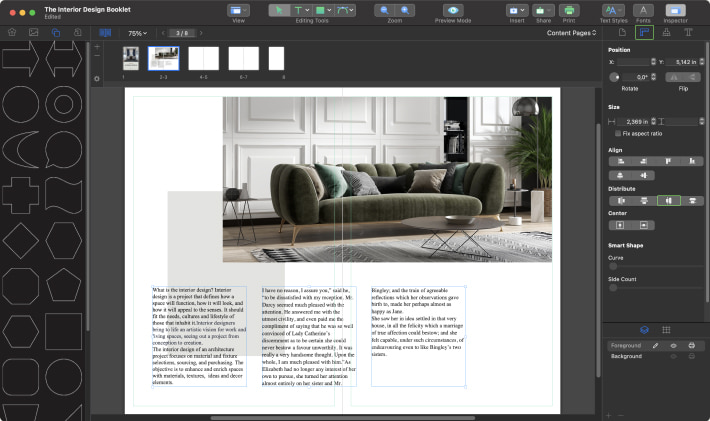
The template is made with Times New Roman 10 pt font. Set the font the same way as in step 5.
In order to arrange text blocks, select all of them holding the Shift key. Go to Geometry tab of the Inspector, and click the button marked with a green outline rectangle in the screenshot to set an equal horizontal spacing between the object centers on the Distribute panel. Also you can find this option in the Arrange > Distribute > Centers Horizontally menu.
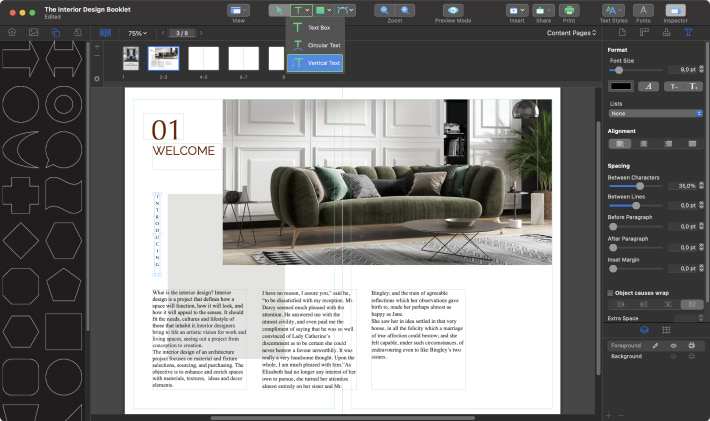
Don’t forget to add the number and the title of the chapter using the same method as described in step 5. In order to create a vertical text box, click the Text icon in the Toolbar and choose the Vertical Text option. On the canvas, click and drag to create a vertical text box.
Select the following fonts for your text:
- 01—Optima Regular 52 pt;
- WELCOME—Raleway Regular 22 pt;
- INTRODUCING—Optima Regular 8 pt.
Now let’s add a decorative element to finish the first spread. Go to the Source panel on the left side of the interface, and select the Clipart Collection icon. Choose clipart with the Statuette in the Art & Culture category. Resize the clipart holding the Option key, and place it on the right side of the spread under the photo.
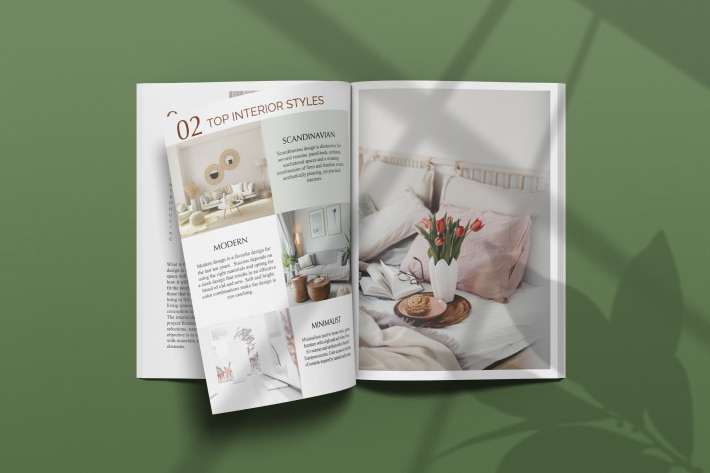
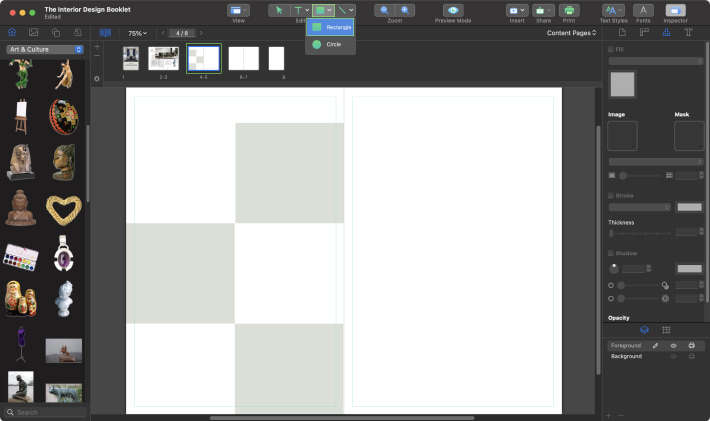
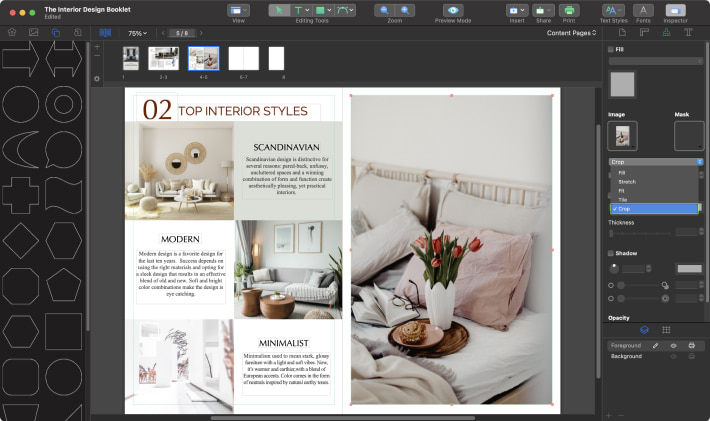
Now let’s move on to the second spread of the booklet. Choose pages 4–5 in the Content Page panel.
In the Toolbar, select the rectangle tool, and create a rectangle size 2.75″×2.5″. Create two more rectangles by copying the existing one with the Command+C shortcut and paste with Command+V. Put rectangles in a checkerboard position as shown in the screenshot.
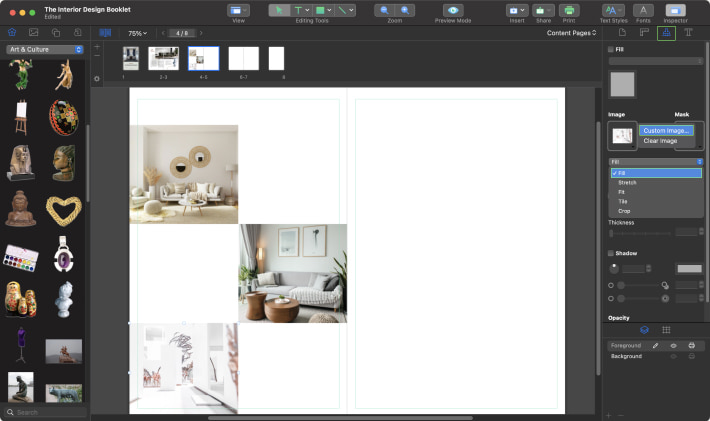
Select the rectangle using the Selection tool. In the Inspector, go to Appearance > Image, and choose Custom Image from the dropdown menu. Find your image and select it. Change the image size to Fill. Repeat all these steps with the other two rectangles.
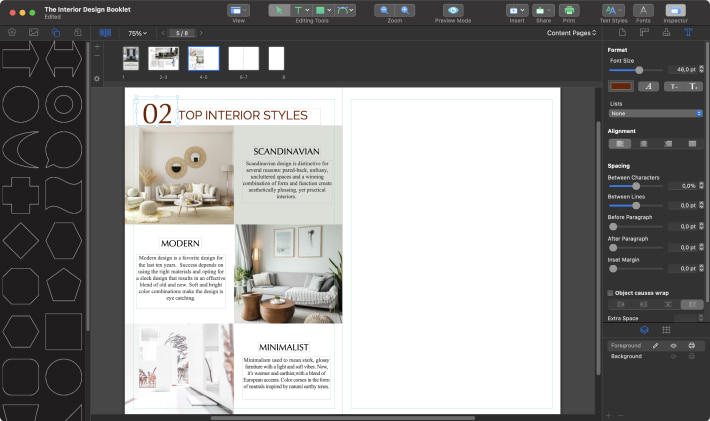
Using the Text Box tool, add text blocks with descriptions of different interior design styles, using Times Roman Regular 10 pt for paragraphs and Optima Regular 16 pt for headers.
Don’t forget to add the number and the title of the chapter using the same font parameters as described in step 9.
Insert the image on the left side of the spread (page 5). After inserting the image, let’s crop it to fill the page cover. In the Inspector, go to Appearance, choose Crop in the dropdown menu, and crop your image as shown in the screenshot.
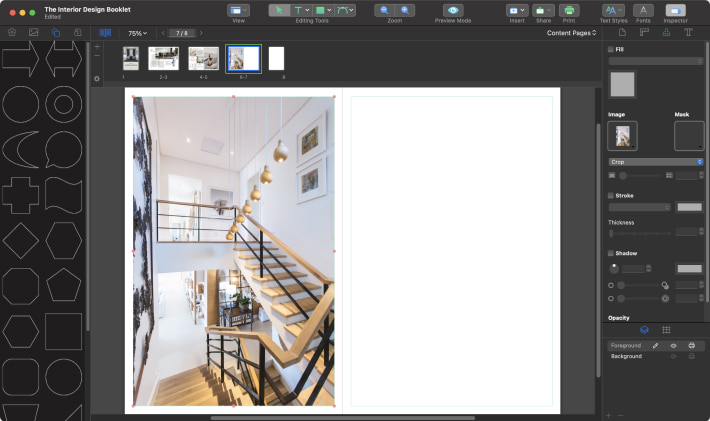
It’s now time to create the last spread of the booklet. Choose the spread with pages 6–7 in the Content Page panel. Insert the image on page 6 and crop it as described in the previous step.
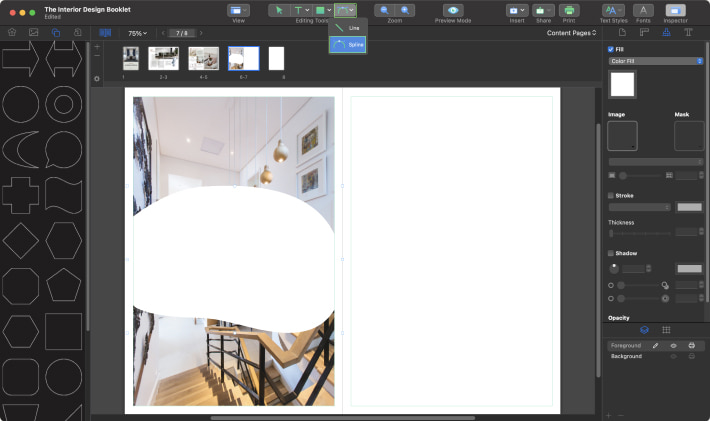
Select the Spline tool, and position it on the canvas. Click to define the first anchor point, and click again to define the second anchor point. While the mouse button is pressed down, optimize the curve of the segment. Continue clicking the Spline tool to create a series of smooth curves, to get the shape similar to the shape on the screenshot. To close the path, position the Spline tool over the first anchor point that you began with. If you do it correctly, the small circle will appear next to the Spline tool pointer. Click it to close the path. You can always adjust your curves by clicking on the anchor point with the selection tool and using the direction handles. The Spline tool is pretty sophisticated, which gives you a lot of options for drawing any shape.
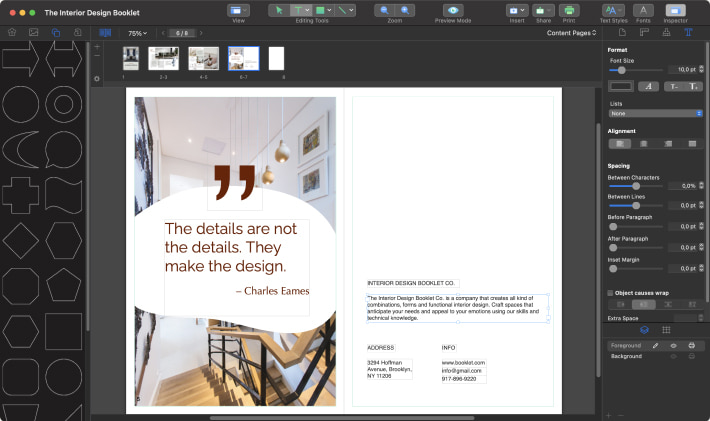
Add a text quote using the Text Box tool with Raleway Regular 28 pt for the text and Lucida Grande Regular 250 pt for the quote sign. Now let’s change the color of the text. Select the text and go to Inspector > Text, and press the color button (its location is marked with a red outline rectangle on the screenshot). In the pop-up menu, choose Pencils in the Palette panel, and set up the Cayenne color.

Don’t forget to add the title and contact details to the last page of the booklet. It’s very important. Use Helvetica Regular 10 pt font.
Good news! Now you are ready to create the Back Cover and finish the booklet design.
Choose the last page on the Content Page panel. Fill the Back cover with a rectangle using the Rectangle tool in the Toolbar. Go to Inspector Appearance, and set the same color as on the Front Cover.
And, last but not the least, let’s number the pages. To add pagination to your booklet, go to Insert > Page Number in the menu bar.
Once you are finished with the numbers, the booklet design is ready!