How to Create Stickers on a Mac in 4 Steps
Technological progress promotes people’s creativity. That’s why there are so many ways to get the word out in the 21st century. Although the majority of them can be noticed literally anywhere, there are still issues when it comes to designing such layouts. One of the examples is stickers. Their cost efficiency and versatility are much appreciated.
You don’t have to pay monthly to prolong the stickers’ life cycle—its gloss on your car or attraction on well-placed signs are sometimes even more eye-catching than common online advertisements. Of course, customers can utilize professional agencies to prepare the necessary designs, but using desktop solutions to get stickers printed will definitely save you a lot of time and money.
Select Your Perfect Materials
If you are going to prepare stickers for the first time ever, then your initial task is to consider which paper you would like to use, which will define some important design and production steps. To make the right choice, it is also necessary to come up with your project objectives.
Overall, there are two types of materials that are commonly used for sticker printing—paper and vinyl. The first option is the least expensive and easiest form to prepare such layouts. Whether you are looking to identify and decorate your homemade goods, record sleeves, etc., they will do the job excellently. This option is usually present in the form of sticker sheet printing materials and Avery labels (also known as pre-cut ones).
Each format has its benefits, but the main criteria to simplify your decision-making are your sticker size and the target object for its application. For instance, opting for whole sticker sheets will work for those customers who have a relatively large template to create. It is also a nice choice for those who would like to cut separate pieces out of one single sheet on their own. If you are going to create stickers for personal use only, then this option will be more efficient.
At the same time, Avery labels will offer more versatility for placing designs that don’t have to be on an even surface only. For example, you can prepare layouts for your bottle decoration or make a great personalized present with unique labeling for each gift item.
In turn, vinyl sticker designs differentiate with their excellent durability. With some tricks applied (if you cover your products with laminate or other waterproof layers), they can be used outdoors and make your advertising stand out. The option of decals will be a lifesaver in this case as well.
Sticker Sizes and Shapes
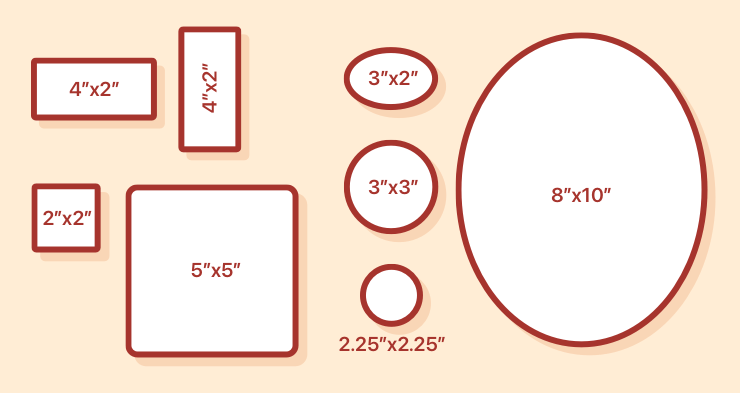
In general, the size of stickers greatly depends on their shape. Placing your target object is also highly important. It is not recommended to use overly large stickers in place of small items since it will damage the visual appeal. There may be several unique custom-made options, but the main solutions include the following forms:
- Rectangular—one of the most widespread types is 4″ × 2″. But you can pick up any sheet orientation (portrait or landscape), and this will also influence the final dimensions.
- Round—2.25″ × 2.25″, as well as 3″ × 3″ are quite popular.
- Oval—these layouts can be as small as 3″ × 2″ or as big as 8″ × 10″, etc.
- Square—pieces of 2″ × 2″ will seem cute, while bigger layouts of 5″ × 5″ or more will work for decorating laptops, cars or any other location you can envision.
The variety of forms can boast of star, heart, hexagon, kite, crescent or rhombus-shaped—any geometric pattern is at your disposal. With the help of a professional desktop solution for publishing, it won’t be a challenge to print out stickers of any design. The brightest sample is Swift Publisher. Since it offers myriad ready-made and customizable templates, it will just take you the twinkle of an eye to create stickers of any complex form and size.
Stay Style Appropriate
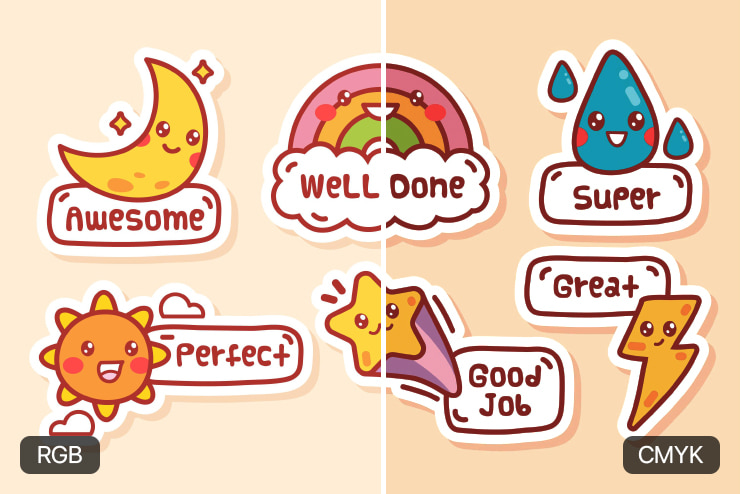
Although stickers seem simpler than multipage projects like flyers or booklets, the main challenge here is to make them attention-grabbing despite their sizes. That’s where the choice of colors is especially crucial. Designs can be simple and contain just letters on a monochromatic background (will work for labeling your homemade production), or they can be presented as multilayer 2D and 3D graphic pictures.
Despite your design peculiarities, it is a must to check how visible all its components are. So, it is highly recommended to print a test page and check whether or not you are satisfied with the achieved result. It is a huge advantage if you print your own stickers at home rather than to use third-party companies since you can make alterations and adjustments immediately.
It is also critical to take the color palette into account to ensure you will have enough resources for your project realization. Heavy use of particular tones can lead to their running out. This is especially true when it comes to printing dozens of paper sheets.
Getting the Result
Choosing the right printer for the job is a somewhat daunting task. Usually, the simplest option to achieve your objectives is an inkjet printer. An average four-color option will suit the major part of layouts, but six-color alternatives will work for templates with more tonal ranges and variations.
Another perfect sticker printer choice is a laser printer. However, customers have to ensure the paper chosen is friendly to your hardware. In this case, using inkjet paper is a perfect way to damage your equipment.
You also need to remember that there are no eternal stickers. Their lifespan depends on the print process and the type of ink and paper chosen. That’s why having an opportunity to revise or update your designs whenever you want is so convenient and appreciated.